Comprehensive Guide to Medical Laboratory Microscopes – Brightfield, Darkfield, Electron & More
Introduction – Why microscopes matter in medicine
Microscopes are the unseen heroes of modern medicine. They enable clinicians to peer into the microscopic world of cells, bacteria and tissue structures, transforming a drop of blood or a biopsy into actionable diagnostic information. Without microscopes there would be no histopathology, no microbiological identification and no ability to monitor the subtle changes that herald disease. From routine blood counts to cancer biopsies, the images generated by microscopes underpin countless clinical decisions every day. As technology advances, the range of microscopes available has expanded dramatically, each tailored to specific applications. Choosing the right instrument is essential for obtaining meaningful data while balancing cost, ease of use and safety.
This comprehensive guide explores the major types of microscopes used in medical laboratories. It explains their working principles, step‑by‑step operation, advantages, limitations and typical clinical applications. Throughout the guide you’ll find links to related posts on FrediTech that delve deeper into specific topics, such as Microscope Technology Explained and Advanced Imaging Techniques Transforming Visualization in Medicine, Industry and Beyond, as well as links to reputable educational resources.
{getToc} $title={Table of Contents} $count={Boolean} $expanded={Boolean}
Understanding basic microscope design
At its core a microscope magnifies tiny structures using a combination of lenses, light sources and detectors. In optical or light microscopes the objective lens collects light transmitted through or reflected from a specimen and the eyepiece or camera enlarges the image for viewing. Brightfield, darkfield, phase contrast, differential interference contrast (DIC) and fluorescence microscopes are all variations of this design. Electron microscopes replace light with a focused beam of electrons to achieve much higher resolution, while scanning probe microscopes such as atomic force microscopy (AFM) use a nanoscale tip to scan surfaces. Modern digital microscopes integrate high‑resolution sensors and software for remote viewing and automated analysislabmanager.com. Each class offers unique strengths and trade‑offs.
Key components
- Illumination source: provides light or electrons. Light microscopes use LED or halogen lamps, while electron microscopes use cathodes to generate electrons.
- Condenser: focuses the illumination onto the specimen.
- Objective lens: collects light or electrons from the specimen to form a primary image.
- Eyepiece or camera: magnifies the primary image. Digital microscopes use high‑resolution sensors and display the image on a monitorlabmanager.com.
- Stage: holds the specimen and allows fine positioning.
- Focus controls: move the stage or objective to bring the specimen into sharp focus.
Having covered the general architecture, we now examine specific microscope types, how they work and why they are used in medical laboratories.
1. Brightfield microscopy – the workhorse of the lab
Principle and operation
Brightfield microscopes illuminate specimens with white light. Light passes through the specimen and into the objective lens, creating an image that appears dark against a bright background. This is the most common type of microscope used in clinical laboratorieslifesciences.danaher.com. It is ideal for stained tissue sections, blood smears and cultured cells.
Step‑by‑step:
- Sample preparation: thin specimens (e.g., blood smear, histology section) are placed on a glass slide and often stained to enhance contrast (e.g., hematoxylin–eosin). Without staining, many biological samples appear nearly transparent.
- Mounting: a coverslip protects the sample. Place it on the stage and secure with clips.
- Illumination: adjust the lamp intensity and the condenser aperture. Brightfield uses direct light; ensure the condenser is centered and the diaphragm is partially closed to optimize contrastlifesciences.danaher.com.
- Focusing: start with the lowest magnification objective lens (e.g., 4×), use the coarse focus knob to locate the sample, then switch to higher magnifications (10×, 40×, 100× oil immersion) for finer details. Use the fine focus knob for clarity.
- Observation and capture: look through the eyepiece or view the digital image. Adjust contrast and brightness as needed. Capture images using a camera for documentation and analysis.
Advantages and limitations
Brightfield microscopes are prized for their simplicity and affordability. They provide colour information and high throughput for routine pathology, microbiology and hematology. Transparent specimens must be stained to provide contrast because the technique relies on differences in light absorptionlifesciences.danaher.com. However, staining kills live cells and can introduce artefacts. Brightfield’s resolution is limited by the wavelength of visible light (around 200 nm), and it struggles to reveal fine details in unstained, transparent structureslifesciences.danaher.com. In such cases other techniques offer better performance.
Clinical applications
- Hematology: counting and differentiating blood cells, detecting parasites such as malaria.
- Histopathology: examining stained tissue sections for cancer diagnosis and inflammatory diseases.
- Microbiology: identifying Gram‑stained bacteria.
- Urinalysis: evaluating sediment for infection or kidney disease.
Brightfield remains the foundational tool for laboratories because of its versatility and ease of use. For transparent living cells or delicate structures, more specialized optical methods are preferred.
2. Darkfield microscopy – illuminating the invisible
Principle and operation
Darkfield microscopy was developed in the 1830s for viewing live microorganismsazooptics.com. In this technique, an opaque disk placed beneath the condenser blocks direct light. Only light scattered by the specimen reaches the objective lensazooptics.com. As a result the background appears black while the specimen glows brightly.
Step‑by‑step:
- Convert the condenser: insert a darkfield stop into the condenser to obstruct the central beam and allow only oblique rays. Some microscopes have dedicated darkfield condensers.
- Prepare the sample: place a drop of liquid (e.g., pond water, cerebrospinal fluid or spirochete culture) on a slide without staining; add a coverslip.
- Illumination: use high light intensity to compensate for the light lost through the darkfield stopazooptics.com.
- Focusing: start with low magnification and focus on the edges of the sample. Because only scattered light is collected, focusing requires patience.
- Observation: microorganisms appear as bright white structures against a black background; pigments may appear as false coloursazooptics.com.
Advantages and limitations
Darkfield microscopy is ideal for unstained, transparent specimens. It provides greater resolution and contrast than brightfield without the need for dyesazooptics.com. It is widely used in microbiology to observe motile bacteria, protozoa and delicate structures such as flagella. However, it demands intense illumination, which can heat or damage samples. Slides must be meticulously cleaned because dust and air bubbles scatter light and appear as artefacts. Darkfield also struggles with thick or densely packed specimens and cannot provide colour information, limiting its utility in histology. Despite these drawbacks, darkfield remains indispensable for diagnosing spirochete infections (e.g., Treponema pallidum in syphilis and Borrelia burgdorferi in Lyme disease) and assessing microbial motilityazooptics.com.
3. Phase contrast microscopy – bringing transparent cells to life
Principle and operation
Developed by physicist Frits Zernike in the 1930s, phase contrast microscopy enhances contrast in transparent biological specimens by transforming subtle differences in refractive index into intensity variationsmicro.magnet.fsu.edu. It is widely used for observing living cells without staining.
How it works:
- Light passing through a specimen is slowed relative to the surrounding medium, creating phase shifts. These shifts are normally invisible.
- A phase contrast condenser directs annular (ring-shaped) light through the specimen; an aligned phase plate in the objective lens selectively retards or advances the background light.
- When the specimen‑altered and unaltered light recombine, phase differences convert to amplitude differences, producing contrastmicro.magnet.fsu.edu.
Step‑by‑step:
- Align annulus and phase plate: set up the condenser annulus and objective phase plate. Adjust the centering screws so the two rings overlap when viewed through a phase alignment telescope.
- Place live cells: mount a sample of transparent cells (e.g., cultured fibroblasts) in a suitable chamber. Avoid staining or fixing.
- Adjust illumination: open the condenser aperture fully to maximize annular light.
- Focus and fine tune: use the fine focus to find the plane of interest. Adjust the phase ring alignment for optimal contrast.
- Record dynamic processes: observe and video events such as cell division, motility or organelle movement without harming the cells.
Advantages and limitations
Phase contrast allows visualization of live, unstained cells with high contrast. It reveals fine details like nuclei, vacuoles and mitotic spindles and is invaluable for cell culture monitoring, sperm motility analysis and embryology. Because it does not require staining, cellular processes can be observed in their native statemicro.magnet.fsu.edu. The main limitations are halo artefacts around objects and reduced resolution at high magnifications. Phase contrast is less effective on very thick or highly pigmented specimens and requires specialized optics, making it more expensive than brightfield. Despite these drawbacks, it remains a mainstay in cytology and reproductive medicine.

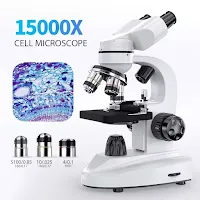
Microscope 40X-2500X Binocular Microscope WF10x and WF25x Eyepieces, Dual LED Illumination, Adult Microscope for School Home Lab Education (Binocular Microscope)
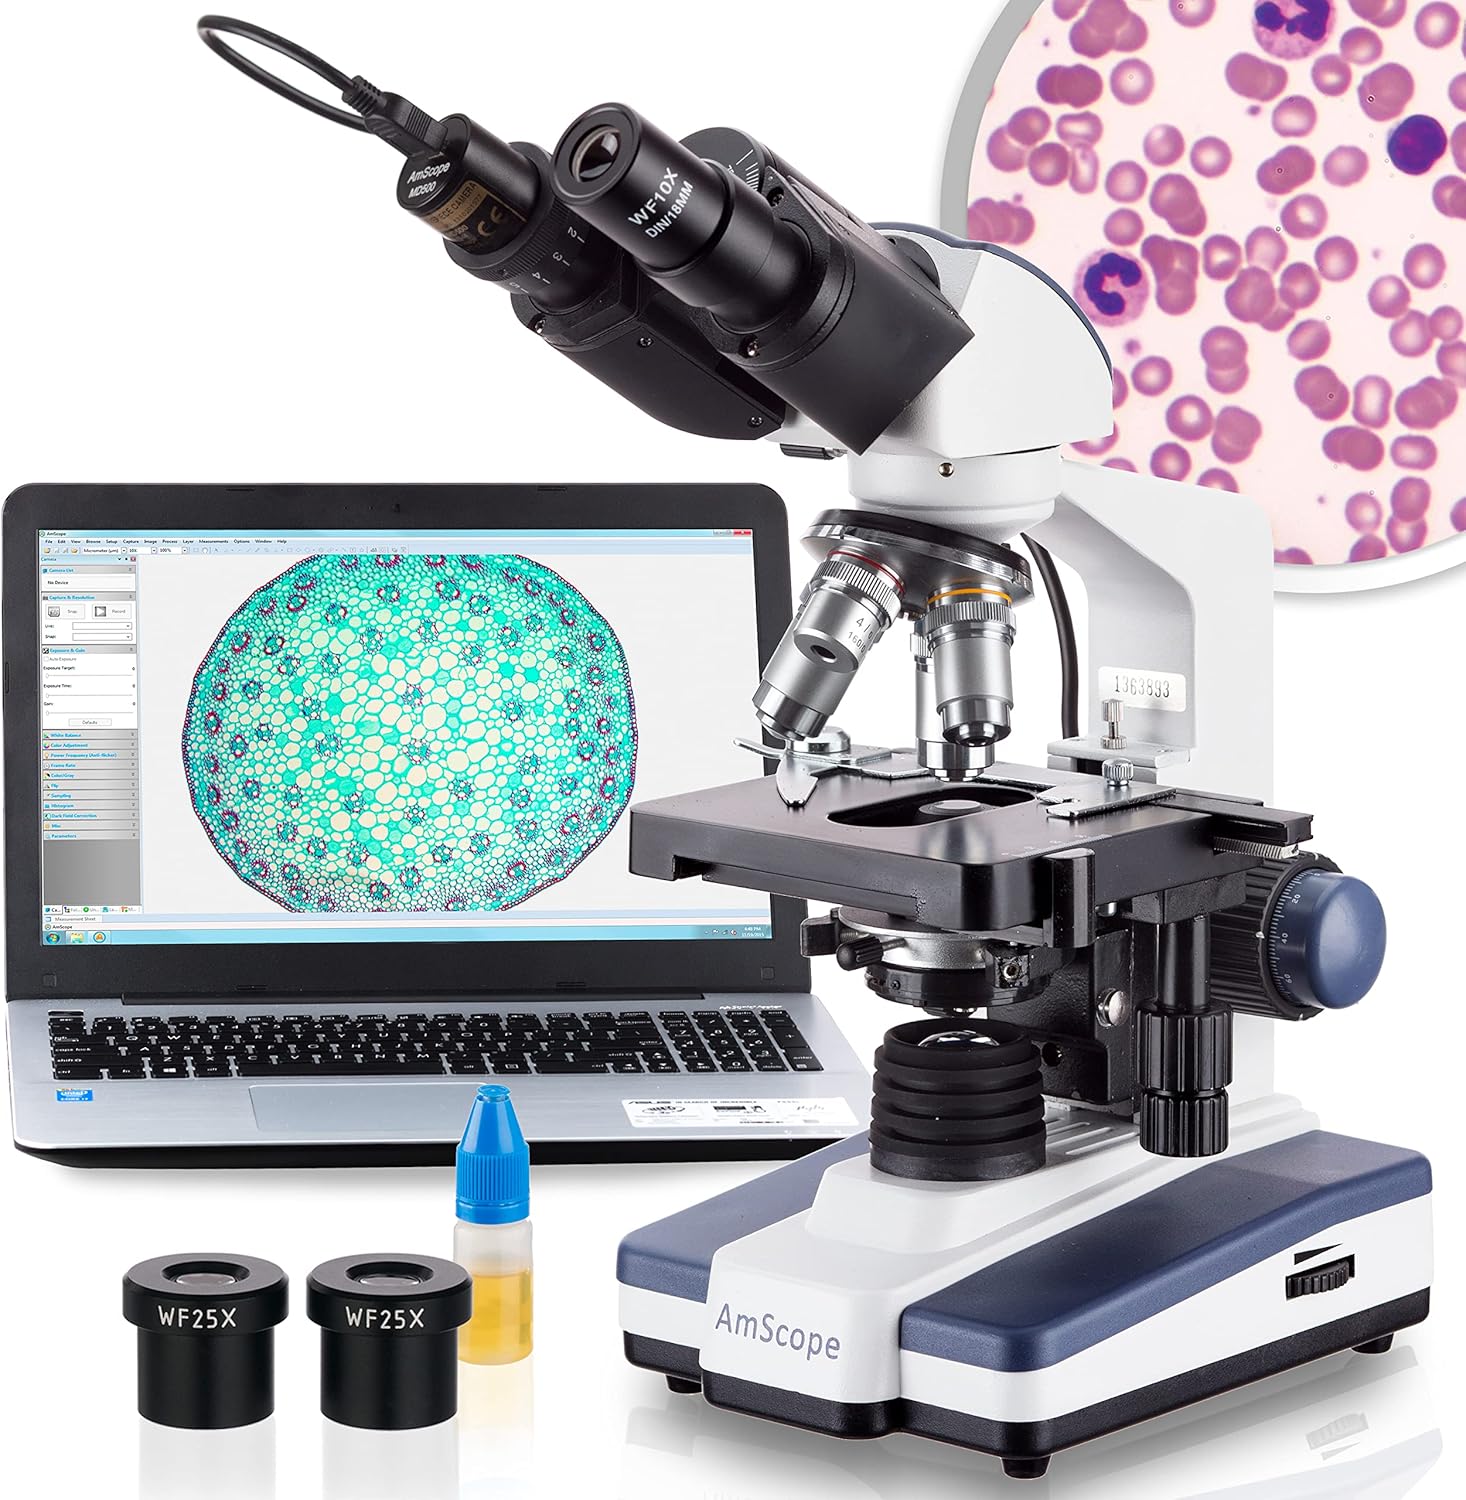
AmScope B120 Series Student Professional LED Binocular Compound Microscope - 40X-2500X Magnification - Includes 5MP USB Camera & Siedentopf Head

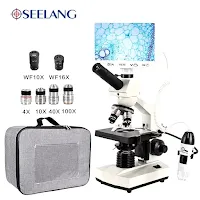
Swift Binocular Compound Microscope SW350B, 40X-2500X Magnification,Siedentopf Head,Research-Grade,Two-Layer Mechanical Stage,1.3mp Camera and Software Windows and Mac Compatible
4. Differential interference contrast (DIC) microscopy – sculpting with light
Principle and operation
Differential interference contrast microscopy (also known as Nomarski microscopy) uses polarized light and modified Wollaston prisms to produce high‑contrast, pseudo‑three‑dimensional images of transparent specimensmicrobenotes.com. Invented in the mid‑20th century, DIC builds on the principles of interference and is particularly valuable for thick, unstained samples.
How it works:
- A polarizer converts light into plane‑polarized waves. A beam splitter (condenser prism) divides this light into two beams with perpendicular polarization and slight spatial offset.
- The beams pass through adjacent points in the specimen, picking up phase differences corresponding to optical path length variationsmicrobenotes.com.
- After recombination by an objective prism and passage through an analyzer (second polarizer), these phase differences convert to amplitude differences, producing relief‑like shading reminiscent of topographic mapsmicrobenotes.com.
Step‑by‑step:
- Install components: ensure your microscope is equipped with polarizers, Wollaston prisms and an analyzer. Align them according to manufacturer instructions.
- Prepare the sample: DIC works best on thick or transparent specimens such as early embryos, protozoa or unstained tissue sections.
- Adjust polarization: rotate the polarizer and analyzer to maximize extinction (dark field) then introduce bias retardation to control contrast.
- Focus and shear: adjust the prism shear to tune the apparent shadowing. Focus on the desired plane and adjust illumination intensity.
- Image acquisition: capture the pseudo‑3D images, which provide shading indicating changes in refractive index across the specimen.
Advantages and limitations
DIC delivers high‑resolution images with strong contrast and a three‑dimensional appearancemicrobenotes.com. It avoids halo artefacts seen in phase contrast and can optically section relatively thick samples thanks to the high numerical aperture optics. DIC is excellent for visualizing live cells, subcellular organelles and dynamic processes over extended periods. However, it requires expensive prisms and specialized objectives, and specimens with intrinsic birefringence (e.g., crystals) can produce misleading signalsmicrobenotes.com. Additionally, DIC images represent gradients rather than absolute intensities, making quantitative measurements challenging. Despite its cost, DIC is widely used in developmental biology and neurobiology where non‑invasive, high‑contrast imaging is essential.
5. Fluorescence microscopy – seeing the invisible through glowing dyes
Principle and operation
Fluorescence microscopy harnesses the phenomenon of fluorescence to visualize specific molecules within cells. Fluorophores absorb light at one wavelength and emit it at a longer wavelength. By tagging cellular structures with fluorescent dyes or proteins, researchers can study the localization, dynamics and interactions of biomoleculesazolifesciences.com.
Key features:
- Excitation and emission filters: select the appropriate wavelengths to excite the fluorophore and separate the emitted fluorescence from background light.
- Dichroic mirror: reflects excitation light while transmitting emitted light to the detector.
- Labels: common probes include DAPI (binds DNA), GFP (green fluorescent protein), rhodamine and MitoTracker (targets mitochondria)azolifesciences.com.
Step‑by‑step:
- Label the sample: stain cells or tissue sections with specific fluorophores or genetically express fluorescent proteins.
- Mount and illuminate: place the specimen on the stage and excite it with the appropriate wavelength (e.g., UV or blue light). Use a filter cube matching the fluorophore.
- Collect fluorescence: emitted light passes through the dichroic mirror and emission filter to the eyepiece or camera.
- Capture multi‑channel images: sequentially switch filter sets to image different fluorophores and merge them to reveal multi‑colour structures.
Advantages and limitations
Fluorescence microscopy offers high sensitivity and specificity because only labelled structures emit lightazolifesciences.com. It allows real‑time imaging of living cells, enables co‑localization studies and supports advanced techniques such as fluorescence resonance energy transfer (FRET). Combining fluorescence with confocal or super‑resolution microscopy yields three‑dimensional and nanoscale information. However, fluorescence requires probes; the specificity depends on antibody or genetic labelling, which can be time‑consuming. Fluorophores can photobleach (lose brightness) and phototoxicity may damage cells at high excitation intensitiesazolifesciences.com. Signal overlap between fluorophores must be managed carefully. Despite these challenges, fluorescence microscopy is indispensable for modern cell biology, immunology and pathology.
6. Confocal laser scanning microscopy – building optical slices
Principle and operation
Confocal microscopy uses lasers and pinholes to produce sharp, thin optical sections of fluorescent specimens, enabling three‑dimensional reconstructions without physical sectioning. A laser scans the specimen point‑by‑point while a pinhole rejects out‑of‑focus light, greatly improving contrast and resolutionvivascope.com.
Step‑by‑step:
- Prepare the sample: typically a fluorescently labelled tissue section or cultured cells.
- Laser scanning: a laser beam is focused onto a single point in the specimen. As the beam scans across the sample, emitted fluorescence from the focal plane passes through a pinhole to the detector.
- Optical sectioning: by adjusting the focal plane up and down (z‑axis), the microscope acquires a stack of images at different depths.
- 3D reconstruction: software compiles the image stack into a three‑dimensional rendering of the specimen.
Advantages and limitations
Confocal microscopy produces high‑resolution, high‑contrast images with accurate depth information. It is widely used in dermatology, ophthalmology and neuroscience for non‑invasive examination of tissuesvivascope.com. Confocal laser scanning can visualize skin architecture in vivo for diagnosing melanoma or monitoring wound healing. The technique’s optical sectioning capability also benefits research in developmental biology and pathology. However, confocal microscopes are expensive, require skilled operators and have limited penetration depth (typically around 100–200 μm)vivascope.com. Prolonged laser exposure can lead to photobleaching and phototoxicity, and imaging large volumes is time‑consuming. Despite these limitations, confocal microscopy remains a cornerstone of biomedical imaging and has paved the way for super‑resolution techniques such as STED and SIM.
7. Polarized light microscopy – revealing birefringent structures
Polarized light microscopy passes plane‑polarized light through specimens and analyzes how the light’s polarization changes after interacting with birefringent materials. Two polarizers are used: one to polarize the incoming light and another (analyzer) to select the orientation of the transmitted light. When birefringent structures are present, they alter the polarization, producing bright colours against a dark background.
Advantages: Polarized microscopy is invaluable for identifying crystalline substances such as urate crystals in synovial fluid (gout) and differentiating amyloid proteins in tissue biopsiesazolifesciences.com. It can also reveal the birefringence of teeth, muscle fibers, neurons and collagen without dyesazolifesciences.com. Because it does not require staining, it is non‑destructive and preserves sample integrity.
Limitations: Polarized microscopy is only effective for materials with birefringent properties, limiting its range of applications. Preparing samples to minimize artefacts can be challenging, and specialized polarizing optics are required. Nevertheless, it remains a powerful diagnostic tool in rheumatology, neuropathology and orthopedics.
8. Electron microscopy – viewing the ultrastructure
Transmission electron microscopy (TEM)
TEM uses a high‑energy electron beam transmitted through an ultra‑thin sample to create detailed images of internal structures. Because electrons have wavelengths thousands of times shorter than visible light, TEM achieves resolutions down to 0.2 nm, enabling visualization of organelles, viruses and macromoleculesncbi.nlm.nih.gov.
Principle and operation:
- Electrons generated by an electron gun are focused by electromagnetic lenses onto the specimen.
- The specimen must be less than ~100 nm thick and is typically fixed, dehydrated, embedded in resin and ultrathin sectioned.
- Electrons transmitted through the specimen are collected by projector lenses and converted to an image on a fluorescent screen or camera.
Applications: TEM is the gold standard for studying cellular ultrastructure (mitochondria, endoplasmic reticulum, ribosomes), diagnosing viral infections, and examining renal biopsies for immune complex deposition. However, preparation is labour‑intensive, specimens must withstand vacuum conditions and the electron beam, and samples are destroyed during imagingncbi.nlm.nih.gov.
Scanning electron microscopy (SEM)
SEM scans the surface of a specimen with a focused electron beam and detects secondary or backscattered electrons to build a three‑dimensional image of surface topologylabmanager.com. Unlike TEM, SEM requires minimal sample thickness and can accommodate larger specimens.
Principle and operation:
- Sample preparation: specimens are fixed and coated with a thin conductive layer (e.g., gold or platinum) to prevent charging.
- Scanning: a narrow electron beam scans across the specimen in a raster pattern. Interactions produce secondary electrons, backscattered electrons and X‑rays.
- Detection: detectors collect these signals to create a grayscale image where brightness corresponds to the number of electrons detectedlabmanager.com.
Advantages: SEM provides high‑resolution, three‑dimensional images of surfaces. It has a large depth of field and is well suited to studying morphology of tissues, insects and deviceslabmanager.com. It requires minimal sample preparation compared with TEM and can accommodate bulkier specimens. New high‑resolution SEMs can achieve sub‑nanometre resolution and produce TEM‑like images due to innovations such as low‑kilovolt scanning transmission detectors and advanced column designspubmed.ncbi.nlm.nih.gov. Benchtop SEMs are cost‑effective and have a small footprint, making them attractive for diagnostic pathology laboratories.
Limitations: SEM is limited to surface imaging and cannot visualize internal structureslabmanager.com. Biological specimens must be dehydrated and coated with conductive material, which may introduce artefacts. Nonetheless, SEM has become essential for examining surface morphology of tissues, microstructures in medical devices and microbial biofilms.
9. Atomic force microscopy – nano‑scale surface probing
Atomic force microscopy (AFM) belongs to the broader family of scanning probe microscopes. Unlike optical or electron microscopes, AFM uses a tiny cantilever with a sharp tip that scans the surface of a sample while measuring the forces between the tip and the surface. This yields topographical maps with sub‑nanometer resolution and allows measurement of mechanical and biochemical properties.
Principle and operation
- A laser reflects off the back of a flexible cantilever and onto a photodiode; as the cantilever moves up and down following the sample’s surface, the deflection alters the laser position.
- The deflection is converted into a force measurement using Hooke’s lawpmc.ncbi.nlm.nih.gov.
- AFM can operate in contact mode (tip touches the surface continuously), non‑contact mode (tip oscillates near the surface) or tapping mode (intermittent contact). Non‑contact and tapping modes reduce sample damagepmc.ncbi.nlm.nih.gov.
Advantages
AFM does not require staining, fixing or dehydrating samplespmc.ncbi.nlm.nih.gov. It can image soft biological materials and hard materials alike, from cell membranes to metal surfaces. AFM can operate in physiological conditions, enabling the study of living cells and their mechanical propertiesmedsci.org. It provides three‑dimensional surface maps and can measure forces at the pico‑newton scale, allowing researchers to detect changes in cell stiffness associated with disease progression. AFM is particularly useful in cancer research, where it helps differentiate healthy and malignant cells by their mechanical propertiespmc.ncbi.nlm.nih.gov.
Limitations
AFM has a relatively small imaging area and slower scanning speed compared with optical microscopes. Tips are delicate and expensive, and contact mode can damage soft samples. Interpretation of force curves requires expertise. Nevertheless, AFM complements other microscopy techniques by providing nanometer‑scale structural and mechanical information.
10. Digital microscopy – the future of telepathology and automation
Digital microscopes replace the eyepiece with a high‑resolution camera and computer system, streaming images to monitors or over networks. By capturing, processing and sharing images digitally, they enable remote diagnostics, automated analysis and collaborative workflows.
How digital microscopes work
- Sensor: a digital camera (CMOS or CCD) mounted on the microscope collects the image. Modern sensors provide high resolution and dynamic range.
- Software: image capture software enables real‑time viewing, annotation, measurement and image enhancement. Artificial intelligence (AI) modules can assist in identifying cells, counting blood components and flagging abnormalities.
- Networking: images can be transmitted to remote specialists for consultation—an essential capability for teleradiology and telepathology. During the COVID‑19 pandemic, 65 % of institutions established home workstations and 74 % moved daytime shifts to remote reading; most radiologists reported reduced stress and similar or improved turnaround timespmc.ncbi.nlm.nih.gov.
Benefits
Digital microscopes streamline workflows by automating image acquisition and documentation. They facilitate remote collaboration, allowing pathologists to work from home or consult with specialists worldwide. Automated scanning can produce whole‑slide images for digital pathology archives. Integrated measurement tools and AI algorithms improve accuracy and consistencylabmanager.com. These features support training and quality assurance.
Challenges
Digital systems are more expensive and require robust IT infrastructure for storage and bandwidth. Users must receive training to manage digital files and interpret images on screens rather than through eyepieces. Data security and patient privacy must be safeguarded. Despite these challenges, digital microscopy is transforming pathology and is likely to become ubiquitous as technology costs decline.
11. Selecting the right microscope – factors to consider
Choosing a microscope depends on the sample type, required resolution, budget and expertise. Here is a step‑by‑step guide:
- Define your application: Are you counting blood cells, studying bacteria, or analyzing ultrastructural changes? Brightfield suffices for stained specimens; live cell observations need phase contrast or DIC; ultrastructure requires TEM or SEM; mechanical properties call for AFM.
- Resolution and contrast: Determine the smallest features you need to visualize. Light microscopes resolve down to ~200 nm, whereas electron microscopes reach sub‑nanometer resolutionsncbi.nlm.nih.gov.
- Sample condition: Consider whether the specimen must remain alive. Phase contrast, DIC and fluorescence are non‑invasive; TEM requires fixed, thin sections; SEM requires dehydration and coating.
- Cost and maintenance: Brightfield and darkfield microscopes are affordable; confocal and electron microscopes are expensive and require specialized facilities. Digital systems add software and storage costs.
- Expertise and training: Advanced techniques (confocal, electron, AFM) require trained operators. Factor in the learning curve when budgeting time and resources.
- Integration with digital systems: For telepathology, choose microscopes with digital outputs or whole‑slide scanners. Ensure your network meets the bandwidth requirements (e.g., 50–100 Mbps recommended for remote work)pmc.ncbi.nlm.nih.gov.
12. Emerging trends and future directions
Microscopy is evolving rapidly. Innovations in super‑resolution microscopy (e.g., STED, PALM, STORM) break the diffraction limit of light, achieving 10–50 nm resolution by controlling the activation of fluorophores. Light‑sheet microscopy minimizes phototoxicity and allows imaging of entire embryos. Multiphoton microscopy penetrates deeper into tissues using infrared light, enabling intravital imaging in living organisms. Adaptive optics correct optical aberrations, improving image quality in thick specimens. Correlative microscopy combines light and electron or scanning probe techniques to link structural and functional information.
AI‑powered image analysis and automation are increasingly integrated into microscopy workflows. Deep learning models can segment cells, quantify biomarkers and predict disease progression from imaging data. AI also assists in low‑dose imaging, where it reconstructs high‑quality images from reduced radiation exposurespmc.ncbi.nlm.nih.gov.
Sustainability and accessibility are additional trends. Portable, battery‑powered microscopes bring diagnostic capabilities to remote settings. Innovations in smartphone‑based microscopes are making basic microscopy accessible in resource‑limited regions.
Frequently Asked Questions (FAQ)
What is the difference between brightfield and darkfield microscopy?
Brightfield microscopy uses white light passing through a specimen; the image appears dark against a bright backgroundlifesciences.danaher.com. Darkfield microscopy blocks direct light, allowing only light scattered by the specimen to reach the lens, so the specimen appears bright on a dark backgroundazooptics.com. Darkfield is better for viewing unstained, transparent organisms, while brightfield excels with stained samples.
Why is phase contrast microscopy important for live cell imaging?
Phase contrast converts subtle differences in refractive index into visible intensity variations, enabling visualization of transparent cells without stainingmicro.magnet.fsu.edu. Because the technique is non‑invasive, researchers can observe cell division, motility and other dynamic processes in real time.
Can I use a standard light microscope as a darkfield microscope?
Yes. Many light microscopes can be converted to darkfield by inserting an opaque stop into the condenser or using a dedicated darkfield condenser. However, high light intensity is required and the technique works best with clean, thin specimensazooptics.com.
What are the main advantages of confocal microscopy over widefield fluorescence?
Confocal microscopy uses a pinhole to eliminate out‑of‑focus light, producing sharper images and enabling optical sectioningvivascope.com. It allows three‑dimensional reconstruction of samples and reduces background fluorescence compared with widefield imaging. The trade‑offs are cost, limited penetration depth and potential phototoxicityvivascope.com.
How is scanning electron microscopy different from transmission electron microscopy?
TEM transmits electrons through ultra‑thin sections to reveal internal ultrastructure at resolutions down to 0.2 nmncbi.nlm.nih.gov. SEM scans a focused electron beam over the surface and detects secondary electrons to produce detailed surface topographylabmanager.com. TEM requires intensive sample preparation and provides 2D internal views, while SEM offers 3D surface images with simpler preparationlabmanager.com.
What role does atomic force microscopy play in medical diagnostics?
Atomic force microscopy uses a nanoscale tip to map surface topography and measure mechanical properties with sub‑nanometer resolution. It operates in physiological conditions without staining or dehydrationpmc.ncbi.nlm.nih.gov. AFM helps differentiate healthy and cancerous cells by measuring stiffness, studies amyloid plaques in neurodegenerative diseases and explores interactions between biomoleculesmedsci.org.
Are digital microscopes reliable for clinical diagnosis?
Digital microscopes provide high‑quality images and enable remote diagnostics through telepathology. During the COVID‑19 pandemic, most institutions that adopted home workstations reported equivalent or improved diagnostic performance and reduced radiologist stresspmc.ncbi.nlm.nih.gov. However, reliability depends on image quality, network speed and the training of users.
What precautions should I take when using a darkfield or fluorescence microscope?
With darkfield, ensure slides and coverslips are clean to avoid artefactsazooptics.com. For fluorescence microscopes, minimize exposure to intense light to prevent photobleaching and phototoxicityazolifesciences.com. Always follow laboratory safety protocols when handling chemicals and biological samples.
Conclusion – The art and science of microscopy
Microscopes have revolutionized medicine by revealing structures that were once invisible. From the ubiquitous brightfield microscope to the sophisticated electron and atomic force microscopes, each instrument has a unique role in diagnosis, research and education. Brightfield and darkfield provide foundational views, phase contrast and DIC bring transparent cells into focus, fluorescence and confocal illuminate specific molecules, electron microscopes unveil ultrastructure, AFM probes the nanoworld and digital systems connect laboratories across the globe. Understanding the strengths and limitations of each microscope empowers clinicians and researchers to select the right tool for their needs and to interpret results with confidence.
As imaging technologies continue to advance, the boundary between microscopic and macroscopic will blur further. Super‑resolution methods, AI‑driven analysis and portable devices will make high‑quality microscopy more accessible and informative. By staying informed about these developments and applying them judiciously, medical professionals can leverage the full power of microscopy to improve patient care and scientific discovery.
Decorative Illustration
Below is a stylized illustration representing the diversity of microscopes. The glowing lines and holographic cells evoke the connection between optical, electron and scanning probe techniques while conveying a high‑tech feel.
For further reading on microscope technology and the evolution of imaging, explore FrediTech’s articles on Microscope Technology Explained and Advanced Imaging Techniques Transforming Visualization in Medicine, Industry and Beyond.
Author credentials: Written by Wiredu Fred, an experienced biomedical equipment specialist and science writer who regularly contributes to FrediTech. Wiredu Fred’s articles blend technical accuracy with clear explanations to demystify cutting‑edge technologies for healthcare professionals and curious readers.
Find These Exclusive Products on Aliexpress! Shop Now!