iOS Update Guide and Advanced iPad Features
Keeping your Apple devices up-to-date is crucial not only for security, but also for unlocking the latest features that can transform your user experience. Apple’s iOS updates bring improvements and innovations to iPhones, while iPadOS (the iPad’s dedicated OS) introduces advanced capabilities that increasingly blur the line between tablet and laptop. In this comprehensive guide, we’ll walk you through how to update your iPhone/iPad to the latest iOS, and then dive into the advanced iPad features that every power user should know about. We’ll cover step-by-step update instructions, real-world benefits of updating (with facts and stats), and highlight cutting-edge iPad features – from multitasking with Stage Manager to creative tools like Apple Pencil integration. By the end, you’ll not only be confident in managing iOS updates, but also equipped to make the most of your iPad’s powerful features. Let’s get started!
{getToc} $title={Table of Contents} $count={Boolean} $expanded={Boolean}
Why Updating to the Latest iOS/iPadOS Matters
Staying on the latest version of iOS (or iPadOS for iPad) is about more than just getting new icons or wallpapers – it’s fundamentally about security, performance, and access to new features. Apple regularly releases updates that patch vulnerabilities and bugs, helping keep your personal data safe from emerging threats. In fact, when Apple released iOS 18 in late 2024, it quickly achieved 68% adoption on all compatible iPhones within a few months, indicating that a large majority of users promptly updated to take advantage of improvements. Apple’s own data showed iOS 18 reached 76% adoption on newer iPhones (last four years) by January 2025.
From a features standpoint, updating ensures you’re not left out. For example, iOS 17 introduced new ways to customize your Lock Screen and major Messages app updates, while iOS 18’s marquee feature was “Apple Intelligence” – on-device AI capabilities for tasks like smarter Siri responses and image generation, albeit limited to newer devices like the iPhone 15 Pro. If you hadn’t updated, you’d miss out on these. Apple also often improves system performance and battery efficiency in updates, meaning your device may actually run faster or smoother on the latest OS. And let’s not forget app support: many app developers target the latest iOS, and over time, older versions lose compatibility. By updating, you ensure maximum app support and functionality.
There’s also a community aspect: as most users update, certain features become widespread standards. For instance, over 80% of iPhone and iPad users tend to install major updates within the first few months of release, so new communication features (like updated emojis or FaceTime capabilities) become common expectations. Staying current means your device “speaks the same language” as the rest of the Apple ecosystem around you.
Finally, consider longevity and support. Apple supports devices with iOS updates for many years (often 5+ years of updates for iPhones). Regularly updating your device keeps it within Apple’s support umbrella. For example, an iPhone 11 that shipped with iOS 13 could still run iOS 18 in 2025, gaining all interim features and security fixes – a testament to how updates extend the useful life of your investment.
Bottom line: Updating to the latest iOS/iPadOS is highly recommended. It’s a quick process (usually just a few taps) that delivers improved security, new features, better performance, and ensures you’re in sync with Apple’s latest innovations. Next, we’ll go through exactly how to perform the update on your iPhone or iPad.
How to Update Your iPhone or iPad (Step-by-Step Guide)
Updating your iPhone or iPad is a straightforward process. You can update over-the-air (wirelessly) or via a computer. Before you begin, it’s wise to do a little prep work to ensure the update goes smoothly:
- Backup Your Device: While updates usually complete without data loss, it’s prudent to have a backup just in case. You can back up automatically to iCloud or connect to a computer and back up via iTunes/Finder. Apple specifically advises backing up your iPhone before any major iOS update to safeguard your data.
- Charge or Keep Plugged In: Ensure your battery is at least 50% or, better yet, keep your device plugged into power during the update to prevent it from dying mid-update.
- Connect to Wi-Fi: Updates can be large downloads. Connect to a stable Wi-Fi network to avoid using cellular data and to speed up the download.
- Know Your Passcode/Credentials: After updating, you might need to enter your device passcode or Apple ID credentials upon reboot, so have those handy.
With preparation done, follow these steps to update:
- Open Settings app on your iPhone or iPad, and tap General (the icon looks like gray gears).
- Tap “Software Update.” Your device will check for any available iOS (or iPadOS) update. If an update is available, it will display the version and some details.
- Start the Download and Installation: Tap “Download and Install.” You may need to enter your passcode to confirm. The update will begin downloading. (If your storage is very full, you might need to free up some space for the download.)
- Agree to Terms and Install: After download, you’ll see an option to “Install Now.” Tap it to begin installation. Alternatively, you can let the iPhone auto-install overnight (if Automatic Updates are enabled).
- Wait for the process to complete: Your device will restart and show an Apple logo with a progress bar. This can take several minutes. Do not turn off or restart the device during this time.
- Finish Up: Once the update is done, your device will boot up to the lock screen. Enter your passcode. You might see a few prompts (for example, agreeing to new terms or enabling new features). Follow any on-screen prompts. Congratulations – your device is now updated!
Apple’s official guide sums it up: go to Settings > General > Software Update to check for updates, then Download and Install if available. It’s that simple. Modern iPhones and iPads can even auto-install updates overnight when plugged in and on Wi-Fi – a convenient option found under “Automatic Updates” in the Software Update settings.
Using a Computer (optional): If you prefer or if the OTA (over-the-air) method isn’t working, you can update via a Mac or PC. On a Mac running macOS Catalina or later, use Finder; on Windows or older macOS, use iTunes. Connect your device with a USB cable, open Finder/iTunes, and click “Check for Update” then “Download and Update”. This achieves the same result, just through your computer.
Most users find the direct on-device update easiest. During peak release days (like when a new iOS drops in September), Apple’s servers may be busy – if the download is slow, just be patient or try again later. Also, if you can’t update (perhaps due to an error), check that your device is supported by the new iOS version and has enough free space. Apple Support notes that if you encounter errors, ensure you have a reliable internet connection and the latest iTunes (if using PC), and refer to Apple’s troubleshooting guide if needed.
Tips for a Smooth Update
- Keep Automatic Updates On: In Settings > General > Software Update, you can enable Automatic Updates → iOS Updates to let your iPhone download updates overnight and prompt you to install. This way, you’ll always be up-to-date without manual checks. (Do note that some major updates still require you to tap “Install” for terms agreement.)
- Check Compatibility: Each iOS/iPadOS has a list of supported devices. For example, iOS 18 supports iPhone XR/XS and later. If an update isn’t showing up, verify that your device model can run it. Older devices that are unsupported will simply stay on their last available version.
- Free Up Space: If your iPhone/iPad refuses to install due to low storage, offload some apps or media temporarily. You typically need a few GB free for the update file.
- Maintain Battery Health: It’s best to update when your device isn’t too hot or cold, to avoid any thermal issues during installation. Also, updates recalibrate battery usage at times, so don’t panic if your battery life seems to fluctuate right after updating – give the system a day or two to resettle background tasks.
- Don’t Delay Critical Updates: Occasionally, Apple issues important security updates (denoted by labels like iOS 17.0.1, etc.). It’s wise to install those promptly. In 2025, Apple even allowed quick Security Response patches that apply without a full iOS update – these keep you safe from urgent threats with minimal hassle.
By following these guidelines, you’ll ensure your update experience is painless. Now that you know how to update, let’s shift gears into the exciting part: what new capabilities can you enjoy on an updated device? In particular, if you’re an iPad user, recent iPadOS versions have introduced advanced iPad features that can dramatically enhance productivity and creativity. From powerful multitasking to accessories that turn your iPad into a laptop-like workstation, the next sections will explore these in depth.
Advanced iPad Features: Unleashing Your iPad’s Full Potential
Apple’s iPads have evolved from simple content consumption devices to veritable productivity and creativity machines. Especially with the advent of iPadOS (since 2019), Apple has been adding features that take advantage of the iPad’s powerful hardware (many iPads now share the same Apple Silicon chips as Macs) and its touch interface. If you’ve updated your iPad to the latest iPadOS, you have a suite of advanced features at your fingertips. Let’s explore some of the standout capabilities and how to use them in real life.
Multitasking and Stage Manager on iPad
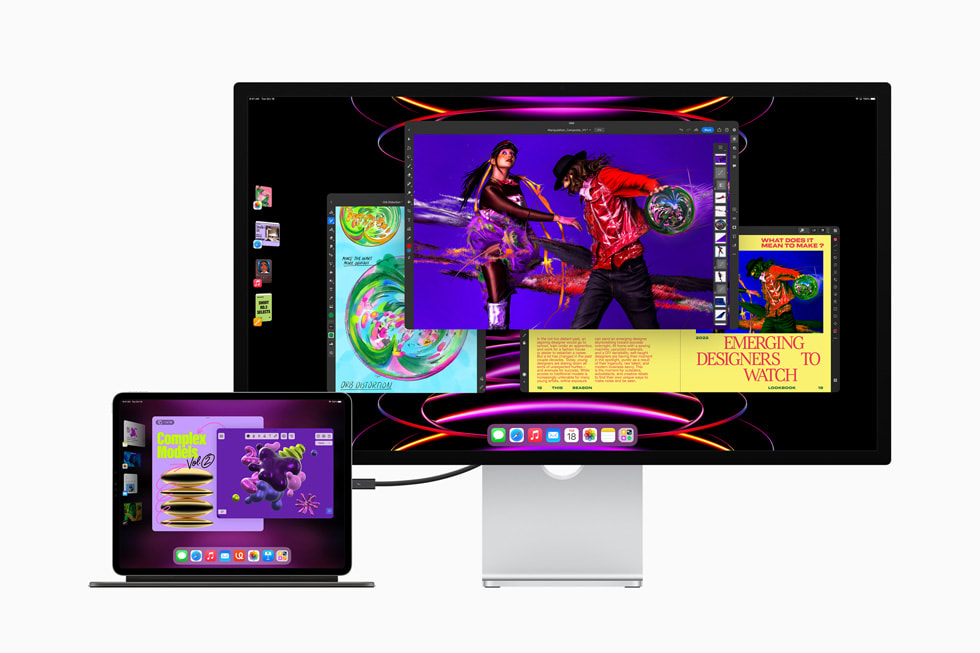
For years, iPads have supported multitasking through features like Split View (two apps side-by-side) and Slide Over (a third app in a floating window). But Apple took iPad multitasking to another level with Stage Manager, introduced in iPadOS 16. Stage Manager is an entirely new windowing system that enables overlapping, resizable windows on iPad – a first for iPadOS. With Stage Manager, you can have up to four apps open at once on your iPad screen, and up to eight apps when connected to an external display. This means the iPad can function more like a desktop; you can arrange a Mail window next to a Safari window, with a Messages chat floating nearby, and switch between clusters of apps with a tap.
How Stage Manager works: When you enable Stage Manager (from Control Center on compatible iPads), your currently used app becomes a window that you can resize and move. Other recent apps appear on the left side as thumbnails. You can drag apps from the Dock or App Library into the workspace to create a group of apps. Need to reference a document while drafting an email? Stage Manager lets you overlay the windows or place them side by side freely, rather than the fixed 50/50 or 70/30 split of traditional Split View. It’s a more flexible experience – much like using a computer. As Apple described it, Stage Manager “automatically organizes apps and windows, making it quick and easy to switch between tasks,” and with iPadOS 16.2+ it enabled full external display support up to 6K resolution, so you can plug your iPad into a monitor and run a multi-window workspace on the big screen.
Real-world example: Imagine you’re a student researching for a paper. On iPad, you could have Safari open with a webpage, alongside the Pages app for writing your essay. Perhaps you also have the Notes app in a smaller window for jotting quick points. With Stage Manager, all three can be active on one screen. You could even play a YouTube lecture in a corner via Picture-in-Picture. If you connect your iPad Pro to a monitor, you might have even more apps – say Safari and Notes on the iPad, and Pages and a PDF reader on the external monitor – all running simultaneously. This level of multitasking was previously impossible on iPad. It turns the iPad into a multitasking powerhouse, great for productivity.
Compatibility: Stage Manager is limited to newer iPads with M-series chips (e.g. M1 or M2 iPad Air and iPad Pro). If you have one of those models, definitely give it a try via Settings > Home Screen & Multitasking. Users report it makes the iPad experience feel much closer to macOS. Even without Stage Manager, don’t forget classic multitasking: you can still use Split View (two apps side by side) and Slide Over (a third floating app) on most iPads. For instance, reading a recipe in Safari while having the Notes app slide over to tick off ingredients is a handy use-case. To use Split View, open an app, then drag another app from the Dock to the left or right edge; for Slide Over, drag it to the center. Mastering these gestures can greatly improve your efficiency on iPad.
Apple Pencil and Creative Features (Scribble, Smart Script, and More)

One of the best accessories for iPad is the Apple Pencil (supported on iPad mini, iPad Air, iPad Pro, and recent base iPads). When you combine Apple Pencil with iPadOS’s advanced features, you unlock a world of possibilities for note-taking, drawing, and even navigating the device.
Here are some standout Apple Pencil-powered features:
- Scribble: This feature lets you handwrite in any text field and have it automatically converted to typed text. For example, you can scribble a reply in Messages with the Pencil, and iPadOS will insert typed text. It works system-wide (in Safari’s address bar, in search fields, etc.), making the Pencil a tool not just for artists but for general navigation. It’s remarkably convenient once you get used to jotting instead of typing for quick inputs.
- Smart Script (Handwriting Neatness): New in iPadOS 18, Apple introduced Smart Script in the Notes app. As you write with Apple Pencil, Smart Script uses on-device machine learning to smooth and straighten your handwriting in real time. If you have messy handwriting, Smart Script will subtly refine it to look more legible while still resembling your style. It’s like having a digital calligrapher assist you. No more worrying that your quick jotted notes will be illegible later – Notes will make them easier to read (while keeping a handwritten appearance). You can even copy your handwritten notes as text if needed.
- Live Math & Graphs: Ever wish your notebook could solve math problems for you? With iPadOS 18, Apple finally added a Calculator app to iPad, and it comes with a twist: Math Notes integration. In the Notes app, you can write an equation with Apple Pencil – say you jot down
y = 2x^2 + 5– and if you put an equals sign, the Calculator will solve the expression inline or even plot the graph in your note. The Apple Pencil lets you work out math naturally as if on paper, but with the benefit of instant calculation and graphing. It can handle not just basic arithmetic but also variables and scientific calculations. For students, this is a game-changer: solving equations or graphing curves by hand and seeing the results dynamically appear in your notes. It brings STEM note-taking to the modern age. - Highlighting and Markup: The Notes app now also offers advanced markup tools like highlighting text with Apple Pencil (using different colors) to make your notes more study-friendly. You can draw perfect shapes (draw a rough circle or star and pause – it snaps into a perfect shape). And for PDFs or screenshots, Markup allows you to annotate freely.
- Hover and Precision: If you have an iPad Pro with M2 chip, the Apple Pencil hover feature detects the pencil up to 12 mm above the screen, allowing you to preview your mark before you draw. For instance, hover over a drawing app and you’ll see a dot indicating where the pencil will touch – great for precision work. In iPadOS, hovering the Pencil can also cause UI elements to expand (e.g., icons or buttons highlight under the tip). It makes the Pencil even more powerful as a precise pointing tool, almost like a mouse. According to Apple, this hover capability lets artists sketch with greater accuracy and makes using the Pencil “even more effortless” by previewing actions.
Real-world example: If you’re an artist, apps like Procreate or Notability become incredibly natural with Apple Pencil – you can shade, draw, and write as you would on paper, with pressure sensitivity and tilt control. If you’re a student, you can handwrite all your notes, then use Scribble to search them or convert to text when needed. One particularly advanced use is taking lecture notes: you can record audio in Notes and scribble at the same time; later, you might highlight key points with the highlighter tool. With Smart Script, your frantic handwriting during a lecture becomes more readable after the fact. And if the lecture includes a formula, you can write it out and have iPadOS solve or plot it. This combination of freeform input with digital power truly augments productivity.
Apple has essentially turned the iPad into a smart notebook, canvas, and textbook all in one. It’s worth noting that not all iPads support Apple Pencil, and there are two Pencil models (1st gen for Lightning iPads, 2nd gen for newer iPads with flat edges). But many recent iPads do – check your model and consider investing in one if you do a lot of note-taking, sketching, or marking up documents.
(Internal link: For a broader look at useful add-ons, see our iPhone Accessories Guide 2025: Enhance Your Apple Experience for ideas – many accessories like styluses, keyboards, and chargers apply to iPads too.)
Keyboard and Trackpad Support (Transforming iPad into a Laptop Alternative)
One of the most significant advances for iPad in recent years was the introduction of full trackpad and mouse support in iPadOS. Along with that, Apple released the Magic Keyboard for iPad – a premium keyboard case with a built-in trackpad. These additions enable a laptop-like experience on the iPad.
Apple’s Magic Keyboard (compatible with iPad Pros and Airs) essentially turns the iPad into a clamshell laptop. It features a tactile keyboard and a multi-touch trackpad, plus a floating hinge design that lets you adjust the screen angle. When you attach an iPad Pro to it, suddenly you have a device with keyboard and cursor support, while still enjoying the touch screen. As one reviewer noted, “the Magic Keyboard gives the iPad Pro the ability to transform into a full-fledged laptop, complete with backlit laptop-style keys and trackpad”. It’s a game-changer for those who want to do serious work (typing long documents, managing spreadsheets, etc.) on the iPad.
Even third-party Bluetooth keyboards and mice/trackpads are supported, so you don’t have to use Apple’s accessories – any keyboard will do for typing. But the Magic Keyboard’s integrated design and added USB-C charging port (it has a pass-through charger) make it very convenient. With a keyboard and trackpad, the iPad’s UI changes subtly: a circular cursor appears on screen, which intelligently snaps to UI elements (buttons, icons) and even morphs to highlight them. Text editing becomes easier with a pointer, and multitasking feels more “desktopy” when you can Alt-Tab (Command-Tab) through apps. Essentially, it bridges the gap between iPad and Mac.
Laptop replacement? For many, yes – especially with advanced iPadOS features now available. You can reply to emails, code (there are apps for coding on iPad or you can remote into a server), write reports, all with the comfort of a hardware keyboard. The trackpad supports gestures (swipe with three fingers to switch apps, for example, just like on Mac). When you want, you can detach the iPad and use it as a tablet again – it’s the best of both worlds.
Real-world feedback from early users was very positive. In fact, a Gizmodo review headline stated “Apple’s Magic Keyboard really does turn the iPad Pro into a neat little laptop”, noting that with the right accessories, the iPad can “fully replace your laptop for every task”. That might be a stretch for extremely heavy workflows, but it’s telling that traditional laptop tasks are now quite feasible on iPad.
Other pointers: If you don’t have a Magic Keyboard, you can still use Apple’s more affordable Smart Keyboard Folio (no trackpad, but a decent keyboard) or any Bluetooth keyboard. And you can pair a Bluetooth mouse – iPadOS even has settings to customize the pointer behavior (like natural scrolling, secondary click, etc.). Don’t forget to try keyboard shortcuts on iPad – holding the Command key in an app often shows a list of supported shortcuts (for example, Command+C, Command+V for copy/paste work in iPadOS too).
Other Notable Advanced Features in iPadOS
Beyond the headline features above, there are several other enhancements that advanced users will appreciate:
- Desktop-Class Apps & Interface: Apple has been updating iPad versions of apps to be more desktop-like. For example, Safari on iPad identifies as a desktop browser by default (so you get full versions of websites, not mobile versions). Apps like Files have a more Finder-like feel now with columns view, etc. In iPadOS 16+, Apple introduced things like a customizable toolbar in apps and a desktop-style undo/redo experience. If you’re using productivity apps (Microsoft Office, Google Docs, etc.), the gap between their desktop and iPad functionality has been shrinking.
- External Storage and Peripherals: Did you know you can plug a USB drive, SD card, or even an external hard drive into an iPad (via USB-C or Lightning adapter) and access files? The Files app lets you copy, move, and manage files from external storage. iPadOS also supports other peripherals: you can connect a DSLR camera to import photos, use an external DAC for audio, or even connect to a printer. With iPad Pros having Thunderbolt (USB4) ports, the bandwidth for peripherals is huge – you could connect high-speed SSDs or even multiple devices via a hub. This makes the iPad viable for workflows like photography (importing RAW images on the go and editing in Lightroom) or video (offloading GoPro footage, etc.).
- Improved Display and Media Features: If you have a high-end iPad (like the 12.9″ iPad Pro with Liquid Retina XDR display), iPadOS includes Reference Mode (for color-accurate work) and supports HDR content beautifully. iPadOS 17 and 18 also introduced the Lock Screen customization (borrowed from iOS 16) – you can now personalize your iPad lock screen with widgets and styles, just like on iPhone. The Photos app got a big redesign in iPadOS 18 with new ways to organize and find images. Little touches like Live Text let you copy text from images or use Visual Look-Up to identify objects in your photos.
- Collaboration and Continuity: iPads work seamlessly with other Apple devices. With features like Universal Control, you can use a single mouse/trackpad across your Mac and iPad (drag and drop files between them – it’s almost magical). Continuity Camera lets you use your iPhone as a webcam for your iPad or Mac. And if you use an Apple Pencil on iPad, you can Instant Note by tapping the lock screen, or quickly sketch in any conversation via Markup. These ecosystem features make the iPad a great companion device even if you primarily use a Mac – or a powerful standalone device that plays well with your iPhone/Watch.
(Interested in the latest Apple devices? Check out our overview of the Apple iPhone 15 Pro to see how the newest iPhone hardware complements iOS advancements, and see our roundup of the Best Smartphones of 2025 for a broader tech perspective.)
As you can see, today’s iPad, paired with iPadOS updates and accessories, is an incredibly versatile tool. Whether you’re a student, an artist, a professional, or a casual user, mastering these advanced features can help you get more done and have more fun with your device.
Conclusion
In this article, we covered two sides of the Apple experience: keeping your device updated and making the most of the new features those updates provide. On the iPhone side, the iOS update guide should empower you to confidently install the latest iOS version – ensuring your iPhone stays secure, fast, and equipped with Apple’s newest offerings. We saw how the majority of users upgrade quickly, benefiting from improvements (with iOS 18 adoption hitting over two-thirds of iPhones shortly after release). By following best practices like backing up and charging your device, you can perform updates smoothly whenever Apple releases them.
On the iPad side, we explored advanced features that truly elevate the tablet into a productivity and creativity machine. From Stage Manager’s multi-window multitasking and laptop-like workflows with Magic Keyboard, to the powerful Apple Pencil features like Smart Script and Math Notes, iPadOS is brimming with capabilities that many users haven’t fully discovered yet. The synergy of hardware and software – an M1/M2 chip allowing desktop-class performance, or a LiDAR scanner enabling AR apps, combined with thoughtful software features – gives the iPad a unique place in computing. It can be your notepad, canvas, laptop, movie theater, and textbook all at once.
This guide is grounded in reputable information – we cited Apple’s official sources and expert reviews to bring you accurate, up-to-date insights. We encourage you to continue learning and exploring. Technology is always evolving, and Apple’s ecosystem is no exception. For example, as of mid-2025, we’re expecting iOS 19 and iPadOS 19 around the corner, which promise to add even more features (early rumors hint at further AI integration and multitasking refinements). Keeping your devices updated will ensure you get to enjoy these as soon as they’re available.
Now that you’re armed with knowledge, it’s time to take action: go ahead and update that iPhone or iPad if you haven’t already, and then try out one new iPad feature you learned about today. Perhaps enable Stage Manager and practice arranging your apps, or use the Apple Pencil to jot a note and see Smart Script beautify it. The more you experiment, the more comfortable you’ll become – and the more you’ll see your iPad as not just a tablet, but your personalized productivity hub.
Happy updating, and enjoy your “new” device with all its capabilities!
For more helpful articles on Apple technology and beyond, feel free to explore other sections on our site. We regularly publish guides, reviews, and tips to help you stay informed and get the most value from your tech.
FAQ (Frequently Asked Questions)
How do I update my iPad to the latest iPadOS?
Updating an iPad is very similar to updating an iPhone. On your iPad, go to Settings > General > Software Update. If an update is available, you’ll see the option to Download and Install the latest iPadOS. Make sure your iPad is connected to Wi-Fi and ideally plugged into power. Tap “Download and Install,” enter your passcode if prompted, and follow the on-screen instructions. The iPad will restart to apply the update. (If your iPad says it’s up to date, then you already have the latest version.) Remember to back up important data before updating, just in case. If you encounter any issues (like an error), ensure your iPad has enough free storage and a stable internet connection. You can also update via a computer using Finder (Mac) or iTunes (PC) if needed.
What is the latest version of iOS/iPadOS in 2025 and which devices support it?
As of mid-2025, the latest major versions are iOS 18 for iPhones and iPadOS 18 for iPads. Apple typically releases these in the fall (iOS 18 came out in Sept 2024, for example). By now, several minor updates (18.1, 18.2, etc.) have been issued to refine features and fix bugs. In terms of device compatibility: iOS 18 supports iPhone XR/XS and newer (basically any iPhone released in ~2018 or later). iPadOS 18 supports a range of iPads – generally, iPad 6th gen and later, iPad mini 5 and later, iPad Air 3rd gen and later, and all iPad Pro models (though features like Stage Manager require M1 chip or newer). If you’re unsure, you can check Apple’s official compatibility list on their website or see if the update appears in your Settings (if it doesn’t show up, your iPad might be too old to support it). Later in 2025, we anticipate iOS 19/iPadOS 19, which will likely drop support for one or two older models, but that information will be clearer once Apple announces it (usually at WWDC or via their website).
What should I do before installing an iOS update to ensure everything goes smoothly?
Great question – preparation can save you from potential headaches. Here are a few steps to do before tapping that “Install” button: (1) Backup your device – use iCloud Backup (ensure it says “Last backup: today”) or plug into a computer and make a backup. This way, if something goes wrong (rare, but not impossible), you won’t lose data. (2) Charge your battery – have at least 50% battery or keep the device connected to power during the update. (3) Connect to Wi-Fi – updates are large; Wi-Fi is more reliable and won’t eat cellular data. (4) Free up space if needed – if your storage is nearly full, consider deleting some unused apps or offloading photos for now, as the update needs room to download/install. (5) Know your passcodes – after updating, you’ll likely need to enter your device passcode, and possibly your Apple ID password for things like iCloud login or App Store (sometimes required to re-enable services). Have those memorized or noted. By doing these, you minimize the chances of update failures. In most cases, updates install without a hitch in about 10-30 minutes!
My iPhone is a few years old. Will updating to the latest iOS slow it down?
It’s a common worry that a big update might make an older phone sluggish. The good news is that Apple designs iOS to support older hardware fairly well. In recent years, Apple’s iOS updates (like iOS 16, 17, 18) have actually aimed to improve performance on older devices or at least maintain it. There’s even a law (in some regions) requiring transparency about performance impacts. Generally, if your iPhone is supported for a given iOS, it should run it capably. For example, users reported that iOS 17 ran as well as or better than iOS 16 on devices like iPhone XR. That said, very old devices at the cutoff (e.g., the first iPhone SE on iOS 15, or iPhone 8 on iOS 16) might feel slightly slower in certain heavy tasks compared to their original iOS version, mainly due to newer features using more resources. But Apple often provides options to disable effects (like you can turn off some animations or features). Also, the benefits (security patches, new functionality) typically outweigh minor speed differences. One tip: after a big update, give your iPhone a day or two – it might do background indexing (spotlight, photos, etc.), which can make it warm or battery drain initially. Once that’s done, performance and battery should stabilize. If you find it truly slow, you could consider turning off background app refresh or motion effects to lighten the load. But in summary, Apple wants you to have a good experience on new iOS, so they do optimize for older models as much as possible. Don’t let fear of slowness keep you from updating, especially for security reasons.
What is Stage Manager, and can I use it on any iPad?
Stage Manager is a new multitasking feature for iPad that allows overlapping, resizable app windows – essentially bringing a desktop-like windowed experience to iPad. We covered it in the article, but to recap: with Stage Manager, you can run multiple apps at once in different windows, and even connect an iPad to an external monitor for additional screen real estate (with separate windows on the monitor). It’s great for productivity, letting you quickly shuffle between apps or have many references open simultaneously. However, Stage Manager is not available on every iPad. It has a hardware requirement: you need an iPad with an M1 chip or later (so, iPad Pro 11” or 12.9” 2021 and newer, or iPad Air 5th gen). These iPads have the Apple silicon chips and RAM that can handle the demands of windowed multitasking. If you have a compatible iPad, you can enable Stage Manager via Control Center (look for the icon with three dots and a rectangle) or in Settings under Home Screen & Multitasking. If your iPad is older (e.g., A-series chips like A12Z, A14, etc.), you won’t see the Stage Manager option – but you still have traditional Split View and Slide Over multitasking. So, in short: Stage Manager is a fantastic feature for supported iPads, but unfortunately it’s not on every model. If you really need it and your iPad doesn’t support it, you’d have to upgrade to a newer iPad Pro or Air.
What accessories can enhance my iPad usage for advanced features?
To get the most out of those advanced iPad features we discussed, a few key accessories can be very helpful: (1) Apple Pencil: As noted, this is almost a must-have for students, artists, or anyone who likes to handwrite or draw. It unleashes features like Scribble, markup, drawing apps, and more. Just be sure to get the correct version for your iPad (1st-gen Pencil for older iPads with Lightning port; 2nd-gen Pencil for newer iPads with flat sides/Magnet). (2) Keyboard and Trackpad: If you plan to do a lot of typing or want a laptop-like experience, consider a keyboard case. Apple’s Magic Keyboard is premium (and pricey) but offers the built-in trackpad too. There are more affordable options from Logitech (like the Combo Touch keyboard case with trackpad) or others. Even a standalone Bluetooth keyboard you might already have will work. With iPadOS supporting mice/trackpads, you could pair a Magic Trackpad or any Bluetooth mouse for easier navigation. (3) Protective case or stand: A case that props up your iPad at a comfortable angle is great for viewing and working. If you use Stage Manager with an external display, a stand to hold the iPad next to your monitor might be useful. (4) USB-C Hub or Adapter: For iPads with USB-C/Thunderbolt, a hub can expand your iPad’s connectivity – giving you HDMI out (for monitors or projectors), SD card readers (photographers rejoice), USB-A ports for thumb drives, etc. This can really turn your iPad into a workstation. (5) External storage: A fast external SSD or even a USB thumb drive can serve as extra storage or for transferring files. iPadOS Files app will let you copy files to/from it. (6) Headphones or Speakers: Don’t forget good audio if you use your iPad for media or video calls – AirPods pair seamlessly, and many iPads still have headphone jacks if you prefer wired. Ultimately, the best accessories depend on your use case. A digital artist might prioritize the Pencil and a matte screen protector (for a paper-like feel), while a writer might prioritize a keyboard. The good news is the iPad has a rich accessory ecosystem. (For detailed picks and recommendations, see our dedicated guide on iPhone/iPad accessories mentioned in the article.)
Author: Fredrick Wiredu – Apple Technology Expert & Editor-in-Chief of FrediTech. Fredrick has over a decade of experience in reviewing smartphones and tablets, with a special focus on the Apple ecosystem. He closely follows iOS/iPadOS developments and has personally tested each feature discussed, from iPhone beta updates to iPad Pro accessories. As an Apple Certified Support Professional and long-time tech journalist, Fredrick is passionate about helping readers get the most from their gadgets. His expertise ensures this guide is accurate, up-to-date, and easy to follow for users of all levels.
References and Related Sources
The following sources were used to verify key details about iOS updates, iPadOS features, Stage Manager, Apple Pencil tools, iOS adoption rates, and iPad productivity accessories.
Official Apple Sources
- Apple Support: Update iOS on iPhone
- Apple iPadOS 18 Preview
-
Apple Newsroom: iPad Pro with M2 and Stage Manager
Read Apple’s official announcement covering Stage Manager and external display support
Industry Reports and Technology Sources
- TechCrunch: iOS 18 Adoption Across iPhones
-
MacRumors: iOS 18 and iPadOS 18 Adoption Rate
Read MacRumors’ coverage of Apple’s iOS and iPadOS adoption data
- Business of Apps: iOS Version Adoption Rates
- AppleInsider: iPadOS 18 Features
-
Six Colors: Magic Keyboard for iPad Pro Review
Read Six Colors’ review of Apple’s Magic Keyboard for iPad Pro
-
Gizmodo: Apple Magic Keyboard Review
Read Gizmodo’s review of the Apple Magic Keyboard experience
Related FrediTech Articles
-
FrediTech: Apple iPhone 15 Pro Review
Read FrediTech’s Apple iPhone 15 Pro review and Apple ecosystem guide