Essential Features of Medical Laboratory Microscopes: A Complete Guide
Introduction
Microscopes are the unsung workhorses of modern healthcare. They allow pathologists to identify cancerous cells, microbiologists to diagnose infectious diseases and researchers to observe the inner workings of tissues and microorganisms. Yet for many clinicians, students and laboratory managers, the intricacies of microscope design are a mystery. This guide demystifies essential features of medical laboratory microscopes, covering the structural and optical components, how they work together to form an image, and emerging innovations that are changing laboratory diagnostics.
We will explore the major parts of compound microscopes used in laboratories, from the eyepiece to objective lenses, stages, light sources and focusing mechanisms. You will learn how magnification and resolution are determined, why illumination matters and how advanced systems such as phase‑contrast and fluorescence microscopes improve contrast and allow new modes of imaging. Real‑world examples – such as the use of oil immersion to diagnose malaria or the role of high‑numerical‑aperture lenses in cancer biopsy analysis – illustrate the concepts.
{getToc} $title={Table of Contents} $count={Boolean} $expanded={Boolean}
Why microscopes matter in medicine
Microscopes are essential tools in laboratory medicine and research. They allow clinicians to see structures invisible to the naked eye, enabling early disease detection and guiding treatment. According to an Excedr overview of microscopy, microscopes are used for diagnosing diseases, conducting research, forensic investigations and educational purposes, and the field has expanded from simple optical microscopes to include stereo, electron, confocal and phase‑contrast microscopesexcedr.com. With the rise of personalized medicine and pathogen surveillance, understanding microscope design helps users select the right instrument for their needs.
Market perspective
The global microscopy market is booming. Precedence Research reports that the market was USD 13.52 billion in 2024 and is expected to more than double to USD 27.58 billion by 2034, growing at 7.39 % annually. Asia–Pacific accounted for 37 % of revenue in 2024, and electron microscopes made up 44 % of revenueprecedenceresearch.com. This growth reflects the demand for advanced imaging in healthcare, life science research and materials science.
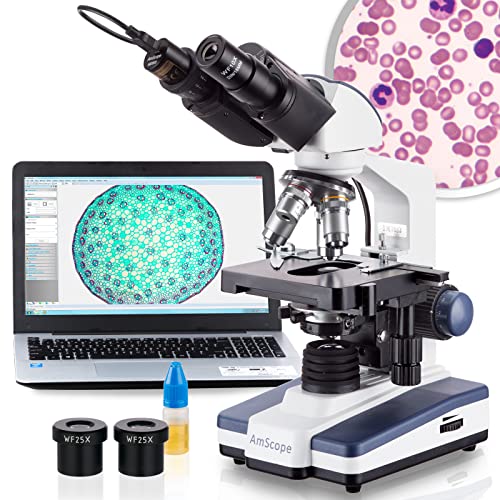
Anatomy of a Compound Microscope
Most clinical laboratories use compound microscopes. These microscopes combine multiple lenses to achieve high magnification. Understanding their parts and functions helps users get the best results and avoid errors.
Structural components
Head, arm and base
The head or body houses the optical components. The arm connects the head to the base, providing a sturdy support and a handle for carrying. Microscope.com notes that these structural parts ensure stability and proper alignment of the optical trainmicroscope.com.
Stage and stage controls
The stage is the platform where the slide rests. Many microscopes have a mechanical stage with stage control knobs that move the slide in the X and Y directions. This translation mechanism allows precise positioning of the specimen. Evident Scientific explains that careful control of the stage and translation system is essential for accurate focusing and image alignmentevidentscientific.com. Stage clips or a slide holder secure the slide. Most laboratory microscopes also include a stage aperture to allow light to pass through the specimen.
Optical components
Compound microscopes rely on a series of lenses and optical elements to magnify and project images.
Eyepiece (ocular lens)
The eyepiece (ocular lens) is the lens closest to the observer’s eye. It typically provides magnification between 5× and 30×, with 10× or 15× being most commonmicrobenotes.com. In binocular microscopes, two eyepieces are mounted in a head that can be adjusted for interpupillary distance. Some eyepieces include a diopter adjustment to account for differences between the user’s eyesmicroscope.com.
Objective lenses
Objective lenses are the primary magnifying lenses. They are mounted on a revolving nosepiece or turret and typically come in sets of three or four. Standard magnifications include 4×, 10×, 40× and 100×, with high‑power objectives (40× and 100×) often retractable to prevent slide damagemicrobenotes.com. Objective lenses determine not only magnification but also numerical aperture (NA) and resolving power, which we discuss later.
Tube and nosepiece
The body tube holds the eyepiece and objectives at the correct distances. The nosepiece allows the objectives to be rotated into place. Some microscopes use a quintuple or sextuple nosepiece to hold more objectives, offering a range of magnifications.
Condenser and diaphragm
The condenser is a lens system under the stage that concentrates light into a cone to illuminate the specimen. Many microscopes use an Abbe condenser for magnifications above 400×, focusing light precisely and producing a bright imagemicrobenotes.com. The iris diaphragm within or beneath the condenser controls the diameter of the light cone and therefore the contrast and brightness of the imagemicroscope.com. Adjusting the diaphragm improves the balance between resolution and contrast.
Illuminator
A critical component is the illuminator, which provides light. Traditional microscopes used mirrors to reflect ambient light, but modern microscopes incorporate built‑in light sources such as tungsten‑halogen, xenon or mercury vapor lampsmicrobenotes.com. LED illuminators are common for their energy efficiency and stable color temperature. Illumination intensity often includes a rheostat for control. According to Lumen’s brightfield microscope guide, bright lighting is essential when using high magnification, and the condenser and diaphragm help concentrate and control the lightnursinghero.com.
Filters and prisms
Many microscopes include filters or prisms to manipulate light. Filters can provide phase contrast or fluorescence; prisms can split beams for cameras or digital sensors. Evident Scientific notes that mirrors, prisms and beam splitters in the optical path help control illumination and redirect light to detectorsevidentscientific.com.
Focusing mechanisms
Coarse and fine focus knobs
Microscopes feature two focusing knobs: coarse and fine. The coarse focus moves the stage or objective rapidly to bring the specimen into rough focus. The fine focus moves more slowly for precise adjustments. Lumen explains that users should always begin with the lowest magnification objective, use the coarse knob to find the image, and then switch to higher objectives and fine focus for claritynursinghero.com. This step‑wise focusing prevents accidentally crashing a high‑power objective into the slide.
Mechanical versus electronic focus
High‑end digital microscopes may incorporate motorized focusing, allowing the stage or objective to move precisely by computer control. These features enable autofocus and Z‑stacking for capturing multiple focal planes, crucial in digital pathology and research.
Understanding Magnification, Resolution and Numerical Aperture
Magnification
Magnification is the product of the objective lens magnification and the eyepiece magnification. A 10× eyepiece and a 40× objective yield 400× total magnification. Lumen reminds users that total magnification quickly reveals the need for intense light: as magnification increases, the image darkens, so proper illumination and condenser adjustment are vitalnursinghero.com.
Resolution and numerical aperture
Magnification is only valuable if the microscope has enough resolution to distinguish two points. Resolution depends on the numerical aperture (NA) of the objective and condenser and the wavelength (λ) of light. Nikon’s microscopy guide defines the relationship using formulas:
Where r is the smallest resolvable detail. Higher NA and shorter wavelengths produce better resolutionmicroscopyu.com. Because blue light has a shorter wavelength than red, blue filters are used for high‑resolution imaging. The NA of the condenser should match or exceed that of the objective to achieve the system’s full resolutionmicroscopyu.com.
Oil immersion
When viewing very small structures such as bacteria, the 100× oil immersion lens provides maximum resolution. A drop of oil (refractive index similar to glass) is placed between the objective lens and the slide. Lumen explains that oil immersion increases the numerical aperture and prevents loss of light due to refraction, producing a brighter, higher‑resolution imagenursinghero.com. Without oil, high‑NA objectives cannot reach their full potential.
Real‑world example: diagnosing malaria
Laboratory diagnosis of malaria often relies on microscope examination of a stained blood smear. The 100× oil immersion objective is used to identify Plasmodium parasites in red blood cells. The technician starts with the 10× objective to scan for fields with adequate staining, switches to 40× for closer inspection and then applies oil and the 100× objective. Adjusting the iris diaphragm and condenser is crucial: too much light washes out the faint parasites, while too little light decreases contrast. Mastering these steps ensures accurate detection and timely treatment.
Illumination Techniques and Imaging Modalities
Brightfield microscopy
The most common technique in medical laboratories is brightfield microscopy, where specimens are illuminated from below and viewed from above. It is ideal for stained tissues or blood smears. The technique requires proper alignment of the illuminator, condenser and diaphragm to produce an evenly illuminated field. As Lumen notes, when high magnification is used, users should open the diaphragm to increase light intensity and use the fine focus to maintain sharpnessnursinghero.com.
Phase‑contrast microscopy
Transparent samples such as living cells often lack contrast. Phase‑contrast microscopes convert phase shifts in light passing through the specimen into amplitude differences, enhancing contrast without staining. This is achieved by specialized phase rings in the condenser and objectives. Phase‑contrast microscopes are widely used for examining urine sediments and cell cultures in microbiology labs.
Darkfield microscopy
Darkfield microscopy creates a bright image on a dark background by using an opaque disc in the condenser to block direct light. Only scattered light enters the objective, revealing structures like spirochetes (spiral bacteria) or nanoparticles that would be invisible in brightfield. Darkfield is useful for detecting Treponema pallidum (syphilis) and other delicate organisms.
Fluorescence microscopy
Fluorescence microscopes use high‑intensity light sources (e.g., mercury arc or LED) to excite fluorochromes that emit light at specific wavelengths. Filters select the excitation and emission wavelengths. These microscopes allow visualization of antigens, antibodies or nucleic acids tagged with fluorescent dyes. For example, immunofluorescence is used to detect anti‑nuclear antibodies in autoimmune diseases, and DAPI staining highlights DNA in cell nuclei. Newer instruments employ LEDs and photomultiplier detectors for sensitive detection and minimal photo‑bleaching.
Confocal and digital microscopy
Confocal microscopes use laser light and scanning pinholes to obtain sharp, optical sections of thick specimens. By rejecting out‑of‑focus light, confocal imaging generates high‑resolution 3D reconstructions of tissues and cell structures.
Digital microscopes integrate digital cameras and image sensors with the optical system. They allow real‑time display on screens and facilitate telepathology and remote teaching. Many modern microscopes incorporate automated scanning stages and image stitching to capture large tissue sections. Machine learning algorithms assist in detecting abnormalities.
Ergonomics and User Experience
Binocular and trinocular heads
Microscopes may have monocular, binocular or trinocular heads. Binocular designs provide comfort during extended viewing and reduce eye strain. Trinocular heads add a third port for a camera, enabling image capture without sacrificing the eyepiece view. Adjustable interpupillary distance and diopter rings help users achieve a comfortable, sharp image.
Stage ergonomics and controls
Modern microscopes are designed with ergonomic stage controls placed near the operator’s hands. Some models have low‑positioned coarse/fine focus knobs, so the user’s elbows remain close to the body. Ergonomic design reduces repetitive strain injuries during long microscopy sessions.
Anti‑vibration and stability
Microscopes should be placed on stable, anti‑vibration tables to reduce image drift during high magnification. Vibration is especially problematic when using high‑NA objectives. Many labs invest in vibration‑damping platforms or heavy granite benches to maintain stable imaging.
Cleaning and maintenance
Proper maintenance prolongs the life of a microscope and ensures image quality. Tips include:
- Keep lenses clean: Use lens paper and appropriate cleaning solutions. Avoid touching optical surfaces with fingers.
- Cover the microscope: When not in use, protect the instrument from dust.
- Service regularly: Have the microscope serviced by professionals to adjust alignment, lubrication and calibration.
- Handle with care: Always carry a microscope by the arm and support the base.
Step‑by‑Step: Using a Compound Microscope
- Preparation: Place the slide on the stage and secure it with clips. Turn on the illuminator and adjust brightness.
- Start with low power: Set the 4× or 10× objective in place. Use the coarse focus knob to bring the specimen into viewnursinghero.com.
- Center and focus: Move the slide using the stage controls to position the specimen. Fine‑tune focus with the fine adjustment.
- Increase magnification: Rotate the nosepiece to the 40× objective. Use only the fine focus to avoid damaging the slide. Adjust the iris diaphragm to optimize contrast and illumination.
- Use oil immersion: When higher magnification is needed, apply a drop of immersion oil on the slide and switch to the 100× oil immersion objective. Slowly adjust the fine focus and adjust the diaphragm and condenser for brightnessnursinghero.com.
- Record or capture images: For documentation, use a camera attached to a trinocular port or a digital microscope. Adjust exposure settings to avoid overexposure.
Emerging Innovations in Microscope Design
LED and laser illumination
Traditional tungsten‑halogen bulbs generate heat and require frequent replacement. Many laboratories are upgrading to LED illuminators, which provide stable, long‑lasting light and reduce heat. Laser sources in confocal and multiphoton microscopes enable precise excitation of fluorophores and deeper tissue penetration.
High‑resolution objectives and super‑resolution
Research microscopes now offer plan‑apochromat objectives with high numerical apertures (NA > 1.4) and excellent color correction. Super‑resolution techniques like STED and PALM/STORM surpass the diffraction limit, allowing imaging of structures below 100 nm. These are more common in research but may trickle down to clinical labs in the future.
Digital pathology and AI
Digital imaging has made remote slide viewing and diagnosis possible. Whole‑slide scanners capture entire histology slides at high resolution. Artificial intelligence (AI) algorithms assist pathologists by identifying cancerous regions and grading tumors. For example, AI models have been trained to recognize metastatic breast cancer in lymph nodes, reducing the workload for pathologists. The combination of high‑quality optics and digital analysis is ushering in a new era of digital pathology.
Portable and point‑of‑care microscopes
Technological advances have led to portable microscopes that can be used in the field or at the bedside. Smartphones combined with simple lenses can achieve moderate magnification for telemedicine. Portable fluorescence microscopes are used for rapid diagnosis of diseases such as tuberculosis in low‑resource settings.
Sustainability and energy efficiency
Modern laboratory microscopes use energy‑efficient LEDs and recyclable materials. Some manufacturers design instruments with modular components to extend lifespan and reduce waste. Sustainable practices align with global efforts to reduce the environmental impact of healthcare.
Maintenance and Calibration of Medical Microscopes
Proper maintenance and regular calibration are critical to ensuring the longevity and performance of your microscope. Neglecting these tasks can lead to degraded image quality and increased downtime. Follow these best practices:
Routine Maintenance Tips
- Regular Cleaning:
- Clean lenses using lens paper and approved cleaning solutions.
- Dust and wipe down the body of the microscope to prevent build-up.
- Proper Storage:
- Store the microscope in a dust-free, stable environment.
- Use protective covers when not in use.
- Scheduled Servicing:
- Arrange annual professional servicing to check for misalignments or wear.
- Calibrate the optics periodically for optimal performance.
Calibration Procedures
- Alignment Check:
- Verify that the optical components are correctly aligned.
- Adjust the focus mechanism and stage alignment regularly.
- Software Updates:
- Ensure the digital imaging software is up-to-date.
- Follow manufacturer instructions for recalibration routines.
- Documentation:
- Maintain a log of maintenance activities and calibration dates.
- Record any anomalies and corrective actions taken.
For further maintenance details, consult the U.S. Food and Drug Administration (FDA) guidelines on laboratory equipment upkeep.
Integrating Microscopes in Modern Laboratories
Integrating advanced microscopes into a modern laboratory setup involves more than simply purchasing the right instrument—it’s about creating an ecosystem that maximizes productivity and enhances data sharing.
Designing an Efficient Workspace
- Optimized Layout:
- Place microscopes in easily accessible locations.
- Ensure ample space for user comfort and equipment mobility.
- Ergonomic Stations:
- Invest in adjustable workstations to reduce strain.
- Integrate comfortable seating and proper lighting to support long hours of analysis.
Training and Skill Development
- User Training:
- Conduct regular training sessions on microscope usage and maintenance.
- Ensure that staff are familiar with both optical and digital components.
- Continuous Learning:
- Encourage participation in workshops and webinars.
- Subscribe to professional journals and online resources to stay updated with the latest advancements.
Data Management and Sharing
- Digital Integration:
- Connect microscopes to a central laboratory information system (LIS) for streamlined data capture.
- Use cloud-based storage solutions for secure backup and easy sharing.
- Collaboration Tools:
- Implement software that allows for annotation and collaborative analysis.
- Facilitate remote consultations by enabling live streaming of microscope images.
Expert Tips and Best Practices
Drawing on insights from laboratory professionals and researchers, here are some expert tips to get the most out of your medical laboratory microscope:
Optimize Image Quality
- Focus Consistently: Always use the fine focus adjustment for critical details.
- Adjust Lighting: Experiment with different illumination settings to enhance contrast.
- Use Calibration Slides: Regularly calibrate with known standards to ensure accuracy.
Streamline Workflow
- Pre-set Configurations: Save frequently used settings on digital microscopes.
- Automated Routines: Leverage automated stage control for high-throughput analysis.
- Maintenance Schedules: Adhere to a strict maintenance schedule to avoid interruptions.
Leverage Digital Tools
- Annotation Software: Use software tools to annotate and highlight areas of interest.
- Remote Diagnostics: Implement telemicroscopy for remote expert consultations.
- Data Analytics: Integrate with laboratory information management systems (LIMS) for advanced data analysis.
Troubleshooting Common Issues
- Blurred Images: Check for dust on the lenses or misalignment issues.
- Uneven Illumination: Ensure proper alignment of the light source.
- Software Glitches: Keep firmware and imaging software updated.
For additional expert insights, visit Microscopy World, a trusted resource for advanced microscopy techniques and troubleshooting tips.
Future Trends and Market Outlook
Electron and scanning probe microscopes
Although this article focuses on optical microscopes, it’s worth noting that electron microscopes (transmission and scanning) provide ultrastructural details down to the nanometer scale. According to Precedence Research, electron microscopes accounted for 44 % of the revenue in the global microscopy market in 2024precedenceresearch.com. Scanning probe microscopes (atomic force microscopy) are also advancing, providing topographical information of biomolecules and materials. These technologies push the boundaries of imaging but require specialized training and costly equipment.
Integration with other technologies
Microscopes increasingly integrate with spectroscopy (e.g., Raman), microfluidics, and electrophysiology. Combining modalities enables researchers to correlate structural observations with chemical and functional data. For instance, Raman microscopy can identify chemical signatures in tissue sections without staining.
Market growth drivers
Precedence Research attributes the growth of the microscopy market to technological advancements, increasing investments in research and development, growing adoption of microscopes in life sciences, and the need for high‑resolution imagingprecedenceresearch.com. The emphasis on precision medicine and early diagnosis will continue to drive demand for advanced microscopes.
Internal Links to Related FrediTech Posts
FrediTech’s blog explores various technological trends in healthcare. Readers interested in how digital innovation is reshaping diagnostics should see our article on Emerging Medical Innovations: Pioneering the Future of Healthcare, which discusses AI‑assisted imaging and other breakthroughs. For a broader perspective on wearable health monitoring devices, read Wearable Tech and Health: Transforming Personal Wellness. These posts complement our discussion of microscopy by showcasing how technology enables earlier detection and personalized care.
Frequently Asked Questions (FAQ)
What is the difference between a compound and a stereo microscope?
Compound microscopes use multiple lenses to achieve high magnification (up to 1,000×). They are ideal for thin, transparent specimens like blood smears and tissue sections. Stereo microscopes provide lower magnification (typically 10×–40×) and a three‑dimensional view, making them better for dissecting larger specimens or performing surgical procedures. Compound microscopes have built‑in illumination and narrow depth of field, while stereo microscopes use separate light sourcesmicroscopeworld.com.
How do I calculate total magnification?
Multiply the magnification of the eyepiece by that of the objective lens. For example, a 10× eyepiece with a 40× objective yields 400× magnification. Remember that increasing magnification without sufficient resolution (numerical aperture) will not reveal additional detail.
Why does the image get darker at higher magnification?
As magnification increases, the field of view decreases and less light reaches the eye. To compensate, open the iris diaphragm and increase illumination intensity. Proper use of the condenser ensures enough light reaches the high‑power objectivesnursinghero.com
What is numerical aperture and why is it important?
Numerical aperture (NA) measures a lens’s ability to gather light and resolve fine details. Higher NA allows better resolution. According to Nikon’s microscopy guide, resolution is inversely proportional to the product of wavelength and NA; using high‑NA objectives and short wavelengths (e.g., blue light) improves resolving powermicroscopyu.com.
How should I clean immersion oil off my objective lenses?
After using oil immersion, carefully wipe off the oil with lens paper or a cotton swab moistened with lens cleaner. Do not leave oil on the objective, as it can damage the lens and attract dust. Avoid using water or harsh solvents.
Are there microscopes that automatically focus or scan slides?
Yes. Motorized microscopes with autofocus and automated stage scanning are available. They can capture entire slides as digital images, enabling telepathology and AI analysis. Some microscopes use machine vision to identify regions of interest and adjust focus automatically.
Conclusion
Microscopes are indispensable in medical laboratories for diagnosing diseases, studying cellular structures and advancing research. By understanding the components – from the eyepiece and objective lenses to the condenser, illuminator and focus controls – users can optimize image quality and obtain reliable results. Concepts like magnification, resolution and numerical aperture highlight the importance of matching optical components and using proper illumination. Specialized techniques such as phase‑contrast, darkfield and fluorescence microscopy expand the range of applications, while innovations in digital imaging, AI and sustainability continue to push the field forward.
As the microscopy market grows and new technologies emerge, laboratory professionals must stay informed about equipment features and best practices. Whether you’re a clinician diagnosing malaria with an oil‑immersion lens or a researcher exploring cellular dynamics with confocal microscopy, a well‑designed microscope is your window into the microscopic world.
Author: Wiredu Fred – Wiredu Fred is a technology and science writer and founder of FrediTech. He has over 10 years of experience explaining complex scientific concepts to diverse audiences and is passionate about making medical and technological knowledge accessible. Fred holds a degree in Molecular Biology and is committed to highlighting innovations that improve healthcare and education.