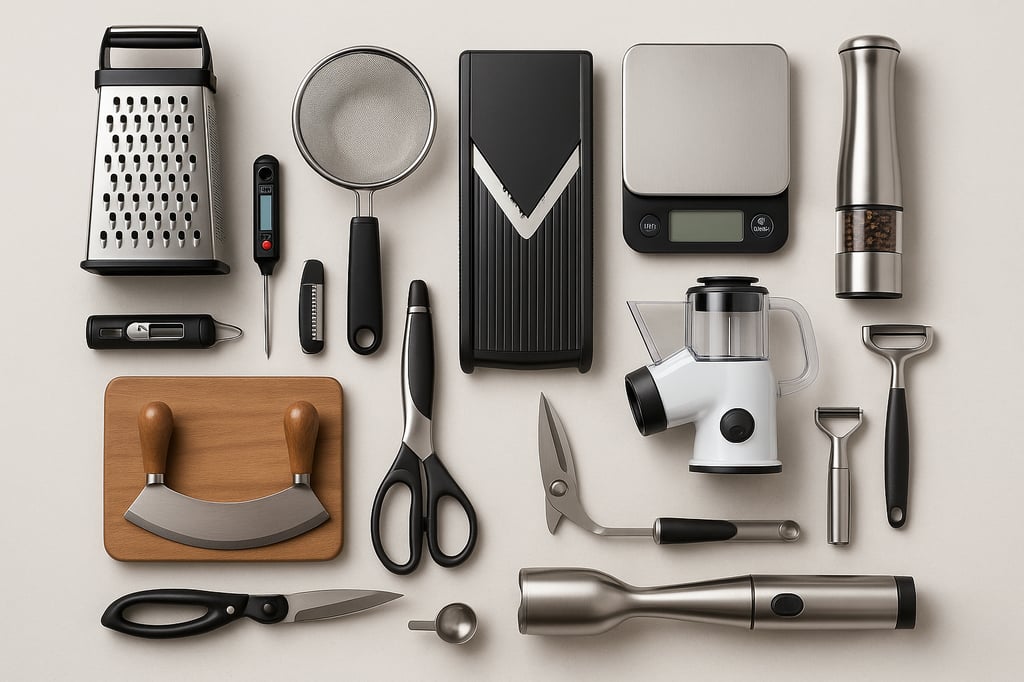
Best Kitchen Gadgets: 2025’s Must‑Have Tools for Every Home Chef
Introduction
Kitchen technology has advanced rapidly in recent years. Devices that once belonged in professional kitchens—instant‑read thermometers, sous‑vide circulators and precision grinders—now fit on home countertops. These tools do more than look sleek; they make cooking safer, more efficient and more enjoyable. Whether you’re a seasoned home chef or a curious beginner, having the right gadgets can transform weeknight dinners into restaurant‑quality meals. This guide highlights the best kitchen gadgets for 2025 and explains how to use them.
 {getToc} $title={Table of Contents} $count={Boolean} $expanded={Boolean}
What makes a gadget “best”?
We selected gadgets that balance performance, ease of use and durability. Many of them come from professional reviews or university extension publications. You’ll find step‑by‑step usage instructions, real‑world examples and links to further reading.
1. Digital Instant‑Read Thermometer
Why you need one
Food safety and precision cooking both depend on accurate temperature readings. Serious Eats’ testers ranked a fast, accurate instant‑read thermometer as one of the most useful kitchen gadgets; they noted that it helps not only with meat but also bread baking and checking the temperature of frying oilseriouseats.com. Grace Kelly, a Serious Eats editor, confessed that before owning an instant‑read thermometer she often guessed whether a steak was done; she now relies on the Thermapen ONE to avoid over‑ or under‑cookingseriouseats.com. A thermometer removes the guesswork when searing steak, roasting chicken or deep‑frying, making it invaluable for beginners and professionals alike.
Step‑by‑step: Using a digital thermometer
- Choose the right thermometer. Look for models with a backlit display, auto‑rotating screen and quick response. The Thermapen ONE is a popular choice among testersseriouseats.com.
- Calibrate (if necessary). Some thermometers require calibration in ice water and boiling water. Follow the manufacturer’s instructions.
- Insert properly. For meat, insert the probe into the thickest part of the protein without touching bone. For liquids like caramel or oil, immerse the probe tip completely.
- Watch the temperature. Use the thermometer throughout the cooking process. When grilling chicken breasts, check the internal temperature at the thickest part. The Ambitious Kitchen grilling guide advises cooking chicken until the internal temperature reaches 165 °F (74 °C)ambitiouskitchen.com.
- Clean the probe. Wipe the probe with hot, soapy water after each use to prevent cross contamination.
Real‑world example
Grilling chicken breast without a thermometer often leads to dry meat or unsafe undercooking. The Ambitious Kitchen’s step‑by‑step guide recommends grilling the chicken for 6–8 minutes per side, then checking the internal temperature with a meat thermometer; once it reads 165 °F, the chicken is ready to restambitiouskitchen.com. By following this method, you’ll serve juicy chicken while ensuring food safety.
2. Precision Sous‑Vide Immersion Circulator
Why you need one
Sous‑vide cooking involves sealing food in a bag and submerging it in precisely heated water. This method yields perfectly cooked steaks, fish and vegetables because the temperature stays consistent. Serious Eats’ reviewers praised the Breville Joule Turbo, noting that it heats a gallon of cold water to temperature in about 22 minutes and maintains a consistent temperature for hoursseriouseats.com. This precision allows chefs to achieve restaurant‑quality results at home.
Step‑by‑step: Sous‑vide steak
- Prep the water bath. Fill a heat‑resistant container with water and attach your immersion circulator. Set the desired temperature (e.g., 130 °F/54 °C for medium‑rare steak).
- Season and bag. Season your steak with salt, pepper and herbs. Place it in a heat‑safe vacuum bag or zip‑lock bag and remove the air (see the vacuum sealer section below).
- Cook. Submerge the bag in the water bath. The circulator will heat and circulate the water to maintain the set temperatureseriouseats.com. For a 1‑inch steak, cook for 1–2 hours.
- Sear. After cooking, pat the steak dry and sear it in a hot pan or on a grill for 1 minute per side to develop a crust.
- Serve. Slice and serve immediately. No resting time is needed because sous‑vide cooking gently brings the protein to the desired temperature.
Real‑world example
Imagine preparing a dinner party with guests arriving at different times. With a sous‑vide circulator, you can cook steaks ahead of time and hold them in the water bath. Even if dinner is delayed, the food will remain at the perfect temperature without overcooking. When guests arrive, simply sear each steak for a minute; the result is a tender, evenly cooked meal that looks and tastes like restaurant fare.
3. Vacuum Sealer
Why you need one
Vacuum sealing removes air around food, reducing freezer burn and preserving flavor. It’s also a key accessory for sous‑vide cooking. Serious Eats recommends the Anova Precision Vacuum Sealer Pro, which includes a built‑in bag cutter and storage compartment and creates a strong, airtight sealseriouseats.com. Even the basic model “worked just as well,” producing an airtight seal at a lower priceseriouseats.com.
Step‑by‑step: Using a vacuum sealer
- Cut and prepare bags. Vacuum rolls let you cut custom sizes. Use the built‑in cutter (if available) to make a bag long enough for your food.
- Fill the bag. Place raw meat, vegetables or leftovers inside. Leave a few inches of space at the top.
- Seal one end. Insert the open end into the machine and press the seal button. The sealer will create a straight seal across the bag.
- Vacuum and seal. Place the filled bag’s open end into the sealing channel. Close the lid and press the vacuum/seal button. The machine removes air and applies heat to create an airtight sealseriouseats.com.
- Label and store. Write the date and contents on the bag. Store it in the refrigerator or freezer. For sous‑vide cooking, the sealed bag goes straight into the water bath.
Real‑world example
Meal prepping for the week becomes easier with a vacuum sealer. You can marinate chicken breasts, divide them into portions, seal them, and freeze them. When it’s time to cook, thaw or cook sous‑vide directly from frozen. The strong seal prevents leaks and keeps flavors intact, reducing waste and saving money.
4. Electric Can Opener
Why you need one
Opening cans may seem simple, but manual openers can struggle with large or oddly shaped cans and often leave sharp edges. The Kitchen Mama electric can opener impressed Serious Eats testers because it handled cans of all sizes and uses a magnet to lift the lid, preventing it from falling into the foodseriouseats.com. Unlike bulky stand‑up models, this handheld opener requires minimal counter spaceseriouseats.com.
Step‑by‑step: Operating an electric can opener
- Position the opener. Place the opener on top of the can, ensuring the cutting wheel touches the rim.
- Start cutting. Press the button; the opener will rotate around the can automatically, cutting along the edge.
- Lift the lid. Once the rotation stops, lift the opener. The magnet holds onto the lid, so you can remove it safely without contacting the sharp edgeseriouseats.com.
- Dispose and clean. Dispose of the lid, rinse the cutting wheel, and store the opener in a drawer.
Real‑world example
If you regularly cook with canned tomatoes or beans, an electric opener saves time and reduces the risk of injury. It’s also a valuable tool for people with limited hand strength or arthritis. Since the Kitchen Mama model is compact, it fits easily into small kitchens or RVs.
5. Conical Burr Coffee Grinder
Why you need one
Freshly ground coffee tastes dramatically better than pre‑ground beans because oxidation begins immediately after grinding. Serious Eats testers highlighted the OXO Brew Conical Burr Coffee Grinder for its easy one‑button operation and twist‑to‑adjust grind settingsseriouseats.com. They noted that this grinder delivers consistent results across various brewing methods and offers excellent valueseriouseats.com.
Step‑by‑step: Grinding coffee
- Select the grind setting. Choose a coarse setting for French press, medium for drip coffee and fine for espresso. The OXO grinder uses a numbered dial for precisionseriouseats.com.
- Add beans. Fill the hopper with whole beans. Avoid overfilling to prevent stale beans.
- Measure the dose. Use the built‑in timer to grind for the required number of seconds. Weighing your beans with a digital scale increases consistency.
- Collect grounds. Ground coffee falls into a container. Tap the container gently to settle the grounds.
- Brew immediately. Transfer the grounds to your brewer of choice. Freshly ground coffee retains aromatics and produces better flavor.
Real‑world example
Let’s say you love pour‑over coffee. Using a blade grinder often results in uneven grounds, causing under‑ and over‑extraction. Switching to a conical burr grinder produces uniform particles, leading to a sweet, balanced cup. The OXO’s ease of use makes it accessible for weekday mornings when speed matters.
6. Compact Espresso Machine
Why you need one
An espresso machine brings café‑quality coffee home. The Breville Bambino Plus stands out because its ThermoJet heating system delivers hot water and steam in a few seconds, allowing you to pull espresso shots and steam milk quicklyseriouseats.com. Serious Eats reviewers recommend it for beginners and experts because it balances performance and priceseriouseats.com.
Step‑by‑step: Brewing espresso and steaming milk
- Warm up. Turn on the machine. Thanks to the ThermoJet, it reaches brewing temperature almost instantlyseriouseats.com.
- Grind and dose. Grind fresh coffee (use the grinder above), tamp it evenly in the portafilter and lock it into the group head.
- Pull a shot. Press the brew button to extract espresso. Aim for a 25–30 second shot; adjust grind size and dose as needed.
- Steam milk. Fill a pitcher with cold milk. Purge the steam wand, then insert it just below the surface to create foam. Lower the wand to heat the milk. The Bambino’s powerful steam lets you create silky microfoam for latte art.
- Assemble the drink. Pour the espresso into your cup, add milk and enjoy.
Real‑world example
Busy mornings often mean skipping a trip to the coffee shop. With a compact espresso machine, you can brew a latte in under two minutes. The quick heat‑up time is especially helpful if you only need one or two drinks. Over time, the machine pays for itself compared with daily café visits.
7. One‑Button Drip Coffee Maker
Why you need one
Drip coffee makers remain popular because they brew multiple cups with minimal effort. The Ratio Six coffee maker uses a well‑designed showerhead and thermal carafe to evenly saturate coffee groundsseriouseats.com. It operates with a single button and maintains coffee at the ideal temperature without burningseriouseats.com.
Step‑by‑step: Brewing drip coffee
- Insert a filter. Place a paper filter in the brew basket and rinse it with hot water to remove paper taste.
- Add coffee. Grind coffee to a medium coarseness and weigh 60–65 grams per liter of water.
- Fill the reservoir. Pour fresh, cold water into the machine’s reservoir.
- Start brewing. Press the single button. The Ratio Six pre‑infuses the grounds and then delivers a steady flow of water through the showerheadseriouseats.com.
- Serve. Once the brew cycle finishes, coffee drips into a thermal carafe that keeps it hot without scorching.
Real‑world example
Hosting brunch for friends? A drip coffee maker can brew enough coffee for six to eight people. Because the Ratio Six uses a thermal carafe, you can prepare the coffee ahead of time and serve refills without reheating. The one‑button operation means you can focus on cooking pancakes or setting the table instead of babysitting the coffee pot.
8. Air Fryer
Why you need one
Air fryers have become a global phenomenon because they promise crispy food with minimal oil. A University of Tennessee extension fact sheet notes that the oil content of air‑fried French fries is significantly lower than deep‑fried friesknox.tennessee.edu. The same report lists multiple benefits: air fryers use less oil, yielding food with fewer calories and less fat, and they don’t require heating large amounts of oil, making them saferknox.tennessee.edu. Air fryers function more like convection ovens; they circulate hot air to cook foodknox.tennessee.edu, and many models double as toaster ovens.knox.tennessee.edu.
Step‑by‑step: Cooking fries in an air fryer
- Preheat (if needed). Some models require preheating. Set the air fryer to 375 °F (190 °C) for fries.
- Prepare food. Cut potatoes into 1 cm sticks, toss them lightly in 1–2 teaspoons of oil and season. The extension fact sheet notes that air frying uses only a small amount of oilknox.tennessee.edu.
- Arrange in the basket. Spread the fries in a single layer; overcrowding leads to uneven cooking.
- Set time and temperature. Cook for 15–20 minutes, shaking the basket halfway through to promote even browning.
- Check for doneness. Fries should be golden and crispy. Add a few extra minutes if needed.
- Clean up. Let the basket cool, then wash it with warm, soapy water.
Real‑world example
If you crave fried chicken or French fries but want to reduce fat intake, an air fryer is a worthwhile investment. According to extension educators, air‑fried foods produce fewer calories and less fat compared with deep‑fried versionsknox.tennessee.edu. The appliance also eliminates the need to store and dispose of large quantities of cooking oil, reducing mess and fire risk.knox.tennessee.edu While the capacity may be limited, cooking in batches is still faster than preheating an oven.
9. Bonus Gadgets and Honorable Mentions
Beyond the eight gadgets above, several other tools deserve attention:
Digital Kitchen Scale
Precision matters in baking. A digital scale measures ingredients by weight, ensuring consistent results. For example, 1 cup of flour can vary by up to 30 grams depending on how it’s scooped; weighing eliminates this variability. Look for scales with a tare function, 1‑gram increments and an easy‑to‑read display. Using a scale also reduces the number of measuring cups you need to wash.
Immersion Blender
An immersion blender is a handheld tool that purees soups and sauces directly in the pot. It saves time (no transferring to a countertop blender) and minimises cleanup. Use it to blend tomato soup, emulsify salad dressings or make smoothies. When shopping, choose models with stainless‑steel shafts and variable speed settings.
Stand Mixer
Stand mixers are the workhorses of the baking world. They mix cake batter, knead bread dough and whip cream effortlessly. Attachments such as pasta rollers and meat grinders expand their functionality. While premium models like the KitchenAid Artisan are investments, they last for decades and can be repaired easily.
Food Processor
A food processor chops vegetables, shreds cheese and kneads dough. It’s ideal for making pesto, hummus or pie crusts. Choose a processor with multiple blades and a wide feeding chute to handle large items like potatoes or whole tomatoes.
Electric Kettle
Fast‑boiling electric kettles heat water for tea, coffee or instant noodles in minutes. Variable‑temperature models let you brew delicate green tea at 175 °F or French press coffee at 200 °F. Look for kettles with automatic shutoff and keep‑warm functions.
While these gadgets may not require citations, they enhance kitchen efficiency. Explore Freditech’s home appliances section for reviews and comparisons.
Conclusion
Investing in quality kitchen gadgets is more than a culinary indulgence—it’s a commitment to food safety, efficiency and enjoyment. A digital thermometer ensures meats and bread reach the correct temperature, preventing undercookingseriouseats.com. Sous‑vide circulators and vacuum sealers enable restaurant‑level precision at homeseriouseats.comseriouseats.com. Electric can openers, coffee grinders, espresso machines and drip makers streamline daily routines. Air fryers offer a healthier way to enjoy crispy foods with less oilknox.tennessee.edu. Additional tools like scales, immersion blenders and stand mixers provide accuracy and versatility. By equipping your kitchen thoughtfully, you’ll cook more confidently, reduce waste and delight friends and family.
Frequently Asked Questions (FAQ)
What’s the most important kitchen gadget for beginners?
A digital instant‑read thermometer is indispensable. It helps you cook meat safely and prevents over‑ or under‑cooking. Serious Eats testers found that an instant‑read thermometer was essential for checking meat, bread and frying oilseriouseats.com.
Do I need both a sous‑vide machine and a vacuum sealer?
For best results, yes. A circulator heats water precisely, while a vacuum sealer removes air around the food, ensuring even cooking. Serious Eats reviewers praised the Anova Precision Vacuum Sealer Pro for its strong seal and built‑in bag storageseriouseats.com. However, you can start with zip‑lock bags and the water‑displacement method if you’re on a budget.
Are air fryers healthy?
Air‑fried foods typically contain less fat and fewer calories than deep‑fried foods. A University of Tennessee extension fact sheet explains that air fryers use only a small amount of oil and produce food with lower oil contentknox.tennessee.edu. However, portion size and overall diet still matter for health.
How do I clean a burr grinder?
Unplug the grinder, remove the hopper and grind chamber, and use a brush to clear out residual coffee. Wipe exterior parts with a damp cloth. Some models have removable burrs for deeper cleaning. Avoid using water on steel burrs to prevent rust.
Why is my espresso shot sour or bitter?
Taste issues usually stem from grind size, dose or brew time. A sour shot often indicates under‑extraction (grind too coarse or shot too short), while a bitter shot signals over‑extraction (grind too fine or shot too long). Adjust your grind on the OXO Burr Grinder and time your extraction to 25–30 seconds to improve balance.
Can I cook frozen foods in an air fryer?
Yes. Preheat the air fryer if necessary, place the frozen food in a single layer and increase the cooking time slightly. Because air fryers circulate hot air, they cook frozen items evenly without needing additional oil. Shake the basket halfway through for best results.
Are electric can openers safe?
Modern electric openers, such as the Kitchen Mama model, cut along the side of the lid and use a magnet to lift itseriouseats.com. This design leaves a smooth edge, reducing the risk of cuts. Always rinse the cutting wheel after use to prevent contamination.
What’s the difference between a drip coffee maker and a pour‑over?
Drip machines automate the brewing process, making multiple cups with minimal effort. The Ratio Six uses a showerhead and thermal carafe to mimic pour‑over techniqueseriouseats.com, but you can’t manually adjust the flow. Pour‑over allows for more control over bloom and flow rate but requires more hands‑on attention.
How long do kitchen gadgets last?
With proper care, quality gadgets can last for many years. Clean and dry appliances after use, descale coffee machines regularly and follow manufacturer maintenance guidelines. Higher‑end devices often offer repair services or replacement parts, extending their lifespan.
Where can I find more reviews and guides?
Freditech regularly publishes detailed reviews and how‑to guides. Visit the kitchen gadgets section for comparisons, buying tips and recipes.
Author – Wiredu Fred, Culinary Enthusiast & Tech Writer at Freditech